Spiralized Vegetable Spring Rolls
Photo by Amy Angelo

Photo by Amy Angelo

Too hot to cook? I hear ya! Enter our AMAZING Spiralized Vegetable Spring Rolls, the perfect veggie loaded meal that will leave you feeling light, satisfied, and cool! These spring rolls are fun to make so get the whole family involved.

Simply prep your favorite veggies into matchsticks (and be sure to take grocery store shortcuts, like buying pre-spiralized vegetables, shredded carrots, and bagged lettuce), wet rice paper and roll away. Dip into your favorite sauce (I love the Almond Sauce from our cookbook), but Sriracha, and coconut aminos all make great options.

I hope you enjoy!

Cheers,

katie :)


Yield: 10 Rolls

Spiralized Vegetable Spring Rolls

  • Rice paper spring roll wrappers, any size, ideally 8 1/2 inches (22 cm) or larger, often found at a Asian market

  • 1 head butter head lettuce, torn into large pieces, or 1 bag store bought butter head lettuce

  • 2 red bell peppers, thinly sliced

  • 2 large cucumbers, thinly sliced into matchsticks

  • 1 cup shredded carrots

  • 1 medium zucchini, spiralized, or bought pre-spiralized

  • Assorted herbs of choice (Thai basil, mint, cilantro), leaves picked

  • Desired sauce for serving, almond, peanut, Sriracha, coconut aminos, etc..

  1. Take a large cutting board and cover with a slightly damp thin cloth napkin or towel.

  2. Pour warm water into a large shallow pan (lie a large bowl or casserole dish).

  3. Working with 1 wrapper at a time, place in warm water until pliable, about 15 seconds. Lay flat on a slightly damp cloth napkin. Place lettuce on bottom half of wrapper, arrange veggies and herbs over lettuce. Fold bottom half of wrapper up over filling. Fold in sides then roll up. Serve with desired sauce

Chef’s Tip: The larger the spring roll wrapper, the easier it will be to fold. When you are placing the wrapper in the warm water, you want the wrapper to be soft and pliable, but not totally disintegrated. If it gets too soft, the wrapper will break. It takes a few rolls to get the hang of it. Be sure to place the wet wrapper on a damp napkin (like a cloth dinner napkin) so it doesn’t stick. Feel free to mix up the ingredients in the spring rolls with what you have on hand  ̶  any kind of lettuce, or shredded cabbage, or even quinoa, will work great!

Photo by Amy Angelo

Photo by Amy Angelo
Katie FarinaComment
Chocolate Chip Cookie Dough Milkshake
Photo by Amy Angelo

Photo by Amy Angelo

The perfect vegan milkshake speckled with home-made chocolate chip cookie dough oat truffles! We start off by making a ridiculously simple oat date truffle (that makes a great healthy snack) then make a quick vanilla milkshake and blend in a few truffles. Can you say YUMMY?!?!! Trust me you won’t even know this milkshake isn’t made with traditional cookie dough.

I hope you enjoy it!

Cheers,

Katie :)


Chocolate Chip Cookie Dough Milkshake

Chocolate Chip Cookie Dough Oat Truffles

Yield: 14 Truffles

  • 1 cup sprouted oats (I like the brand One Degree Organics)

  • 1 cup soft medjool dates, pitted

  • 1 tablespoon melted coconut oil

  • 1 tablespoon maple syrup (optional)

  • ½ teaspoon salt

  • ¼ - ½ cup fair trade dark chocolate chips or chunks (I like Guittard)

Directions:

  1. Place oats in food processor, process until a flour consistency is reached, about 1 minute.

  2. Add dates, coconut oil, maple syrup (if using), and salt to food processor. Process until dough is reached, this takes about 1-2 minutes. It should create a big ball in your food processor.

  3. Add chocolate to mixture and pulse until combined.

  4. Roll into 1 tablespoon size truffles. Place in the refrigerator until ready to enjoy.

Chocolate Chip Cookie Dough Milkshake:

Yield: 2 Servings

  • 1 ½ cups vegan vanilla ice cream of choice

  • ½ cup non-dairy unsweetened milk of choice

  • 2-3 cookie dough truffles

Directions: Blend all ingredients except cookie dough truffles until smooth. Add cookie dough truffles and blend on low until truffles are broken up but not liquefied, about 20 seconds.

SPONSORED POST but the opinions are my own.

Katie FarinaComment
Peanut Butter Lovers Sundae
Photo by Amy Angelo

Photo by Amy Angelo

This is a peanut butter lovers dream come true! I think peanut butter and chocolate is just the best combination EVER! This sundae is so simple + easy to make and will jonsing for more.

We start off my making a super simple hot fudge sauce that rivals any store bought counterpart but is much healthier. Simply melt chocolate, add canned coconut milk, a little coconut sugar, and coconut oil and you’re left with the perfect hot fudge. Then whisk together the super simple Peanut Butter Caramel that will become your new addiction — trust me! Simply whisk together creamy drippy peanut butter, melted coconut oil, maple syrup, and a pinch of salt. Drizzle the two sauces over your favorite vegan ice cream for the most perfect sundae.

If you have leftover Peanut Butter Caramel it’s great for dipping apples into … or just eating by the spoonful!

I hope you enjoy it!

Cheers,

Katie :)


Yield: 4 Servings

Peanut Butter Lovers Sundae

HOT FUDGE:

  • 1 cup fair trade chocolate chips

  • 2 tablespoons coconut sugar

  • 1 tablespoon coconut oil

  • 1/2 cup canned coconut milk, do not use Trader Joe’s brand, I like Thai Kitchen

Directions: Combine all ingredients in a small sauce pan over low heat, whisk until melted. Drizzle over brownies and ice cream.

PEANUT BUTTER CARAMEL:

  • 1/4 cup smooth salted peanut butter, at room temperature

  • 1/4 cup coconut oil, melted

  • 1/4 cup maple syrup, at room temperature

  • Big pinch of salt

Directions: Whisk together all ingredients until smooth, or blend until smooth. Salt to taste.

*** Your peanut butter must be drippy and creamy for this to work, if it’s straight from the fridge you’ll need to melt it.

SUNDAE ASSEMBLY:

  • 1 pint of your favorite vegan ice cream (I like Coconut Bliss)

  • Hot fudge (see below)

  • Peanut Butter Caramel (see below)

  • Optional Garnishes: Chopped peanuts, shaved chocolate, whipped cream, chopped peanut butter cups, sprinkles

Directions:

  1. Scoop ice cream and drizzle with Hot Fudge, Peanut Butter Caramel, and finish with desired toppings.

Katie Farina2Comment
Perfect Truffle Fries
Photo by Amy Angelo

Photo by Amy Angelo

Perfect vegan truffle fries, need I say more?!?! I love love love truffle fries, the problem is they’re not often vegan being sprinkled with cheese and dipped into traditional mayo. But, not these, they’re delicious, happen to be vegan and taste better than the original.

SO go on and get fancy and make these fries for you next date night, party, or just for yourself!

I hope you enjoy!

Cheers,

katie :)


Yield: 4 Servings

Perfect Truffle Fries

  • 4 large or 6 small russet potatoes, skin on, cut into fries

  • high heat oil of choice (coconut, avocado, grapeseed, etc…)

  • 1/2 cup vegan mayo (I like Sir Kensington aquafaba mayo)

  • 2 tablespoons white truffle oil

  • salt

  • truffle salt, optional

  • chopped parsley, optional garnish

  1. Pre-heat oven to 425. Line 2 baking sheets with parchment paper.

  2. Toss potatoes in enough oil to coat and a few generous pinches of salt. Place on prepared baking sheets, being sure to evenly spread out.

  3. Bake for 35-45 minutes, stirring every 10 minutes to prevent fries from burning.

  4. Meanwhile whisk together vegan mayo and truffle oil.

  5. Once fries are crisp to your liking, remove and season with truffle salt or regular salt as desired. Garnish with parsley if desired and serve with Truffle Aioli for dipping.

Katie Farina2Comment
Wild Blueberry Smoothie Bowl
Photo by Amy Angelo

Photo by Amy Angelo
Upgrade your breakfast with this beautiful + delicious smoothie bowl. It’s packed with antioxidants thanks to wild blueberries and cherries. Wild blueberries are a special food and actually have twice the amount of antioxidants as traditional blueberries and have powerful detoxing properties, that are especially amazing for removing heavy metals from the body. It’s almost impossible to find fresh wild blueberries unless you live in certain parts of the world. But, I can always find frozen wild blueberries at Whole Foods or Trader Joe’s. Be sure to thaw the fruit before blending, the thawing process will soften the fruit a bit making it so you won’t need to add as much liquid to the blender ensuring it’s more of a soft serve consistency as opposed to a a smoothie consistency.

I hope you enjoy!

Cheers,

katie :)


Yield: 1 big serving

Wild Blueberry Smoothie Bowl

  • 2 cups frozen wild blueberries, thawed 15 minutes

  • 1 cup frozen cherries, thawed 15 minutes

  • 1 frozen banana, cut into chunks, thawed 15 minutes

  • 3/4 cup non-dairy unsweetened milk, or more if desired

  • Optional garnishes: berries, mint, granola, hemp seeds, cacao nibs, banana

  1. Combine blueberries, cherries, banana and unsweetened milk in a food processor or blender.  Blend until completely smooth and a soft serve consistency is reached, adding more liquid if needed. Garnish with desired toppings.

Photo by Amy Angelo
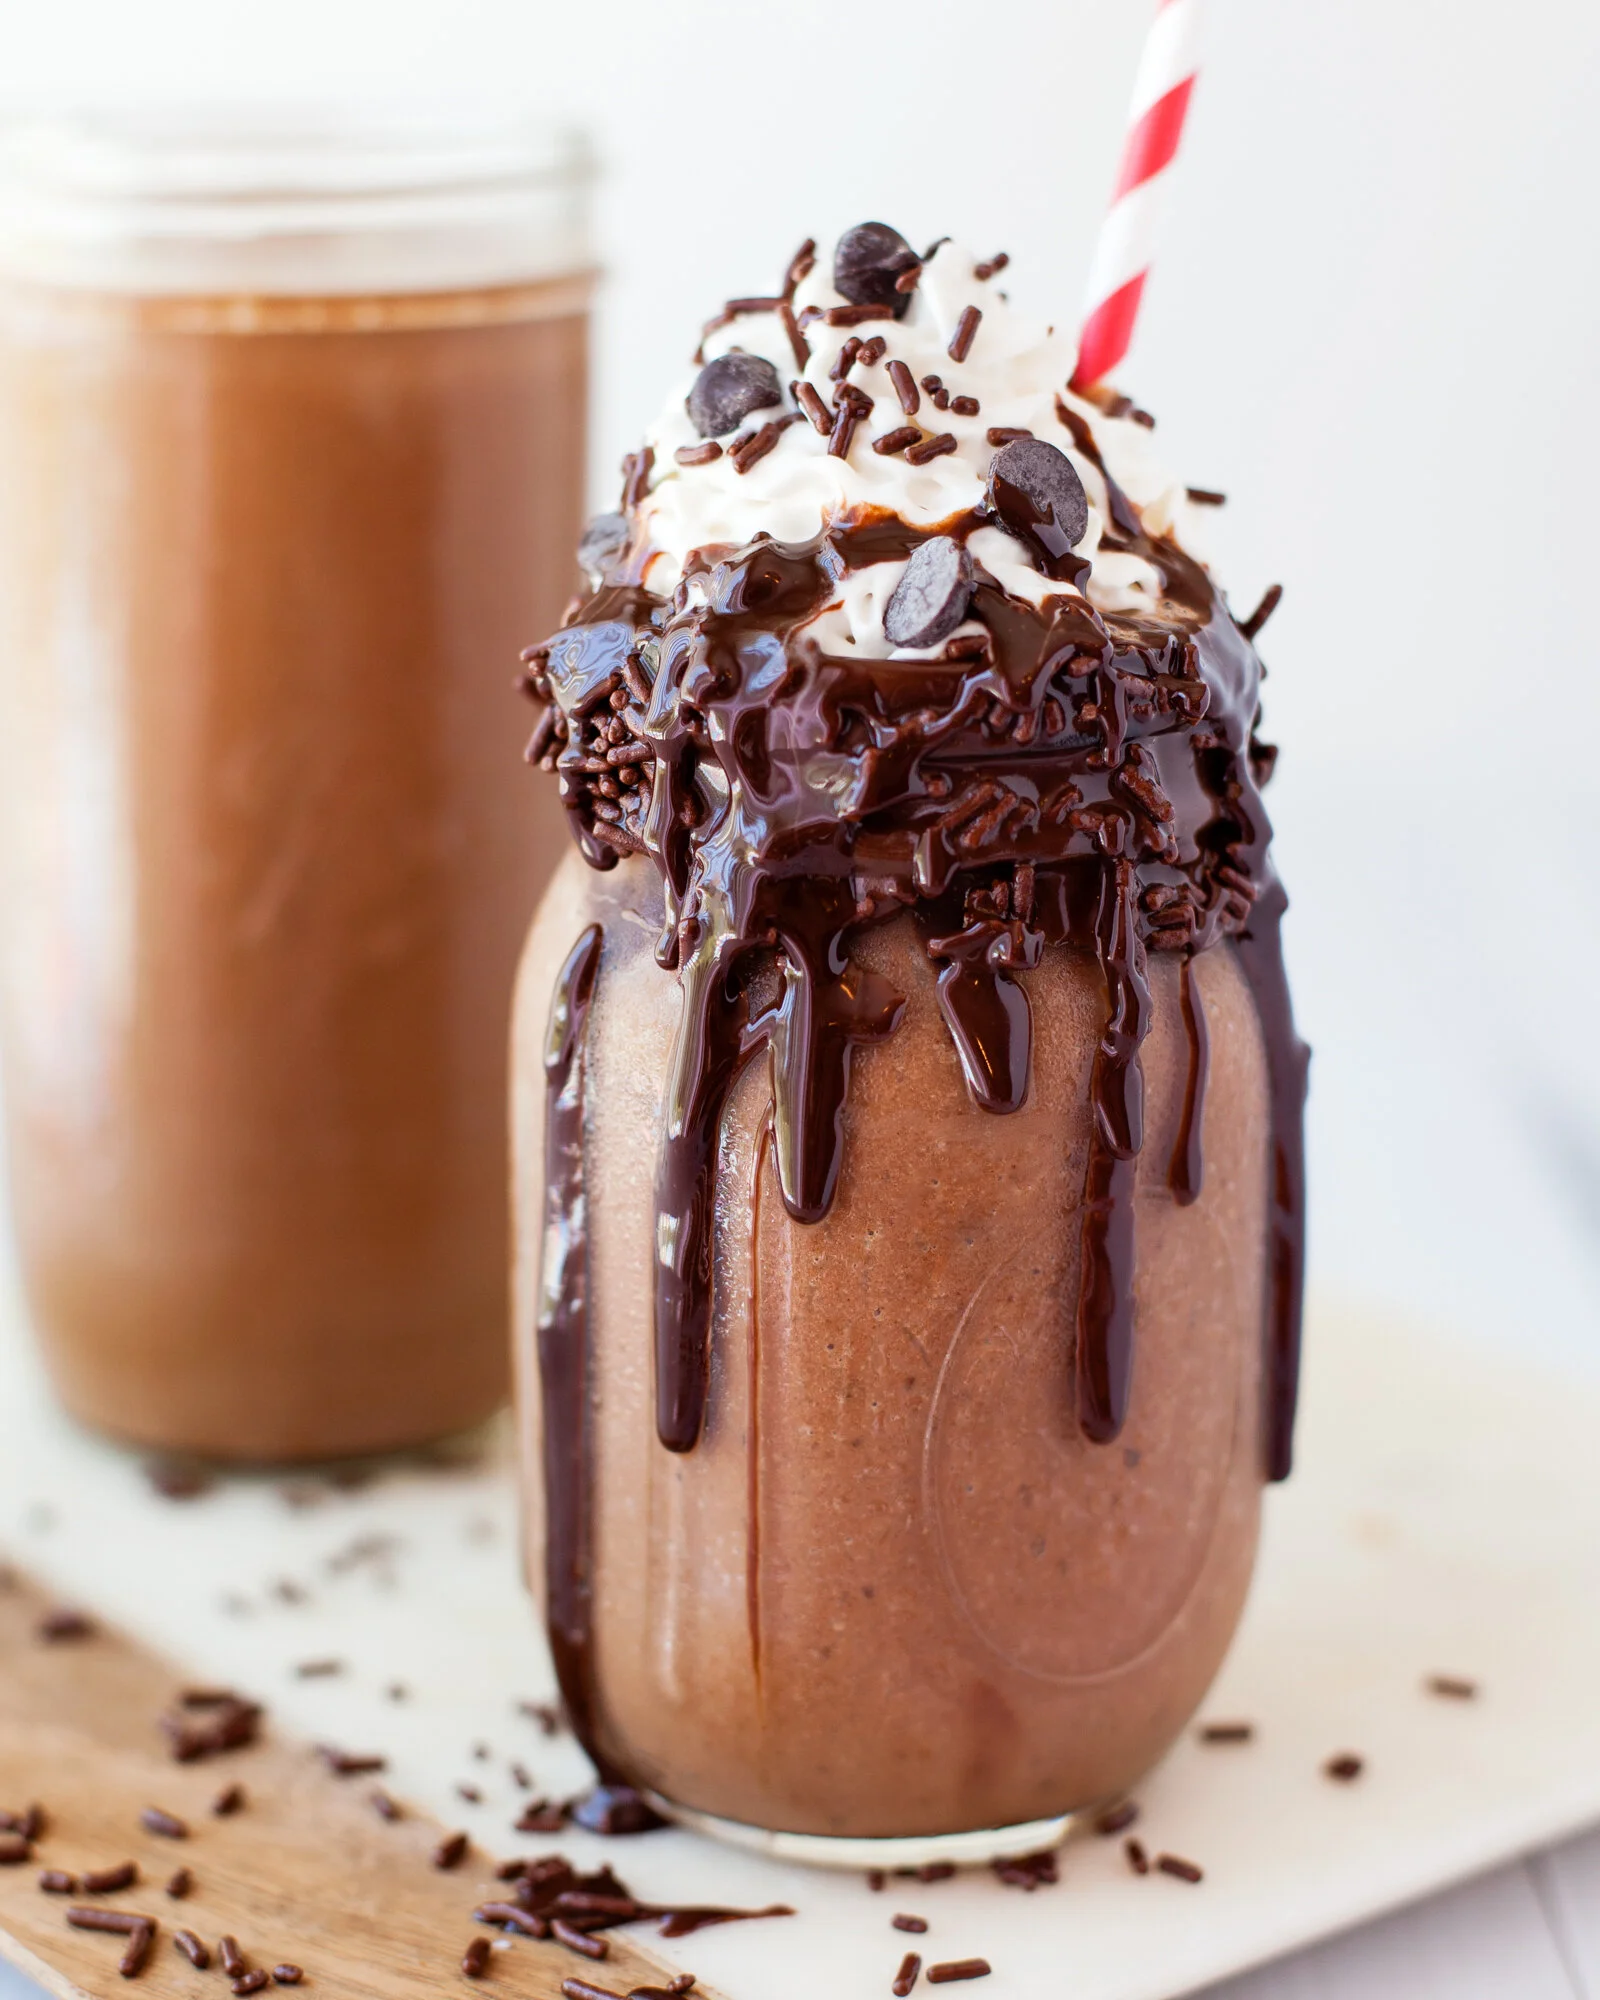
Photo by Amy Angelo

Katie FarinaComment
Clean Eating Cake Batter Milkshake
Photo by Amy Angelo

Photo by Amy Angelo

This might be my favorite easy + delicious dessert creation yet! This milkshake is healthy enough to have for breakfast, yet it literally tastes like a totally indulgent cake batter milkshake.

We start off with canned coconut milk and regular non-dairy carton milk for the base, then add frozen banana + dates for sweetness, then finish with protein powder and vanilla for the perfect flavor and cake batter texture. Feel fee to leave out the stevia if you prefer, but the vanilla protein powder is a must. When picking out a protein powder just make sure you like the taste and texture of it as that will change how the milkshake tastes.

I hope you enjoy!

Cheers,

katie :)


Yield: 1 big serving

Clean Eating Cake Batter Milkshake

• 1/4 cup canned coconut milk, or for a low-fat version use 1/4 cup more non-dairy milk of choice
• 3/4 cup non-dairy unsweetened milk of choice
• 1 tablespoon vanilla protein powder
• 1 frozen banana, cut into chunks
• 2 dates
• 1/2 teaspoon vanilla
• 1 cup ice cubes

  1. Blend all ingredients together, adjust sweetness as desired. Enjoy immediately.

Photo by Amy Angelo

Photo by Amy Angelo

Katie Farina2Comment
Super Food Iced Matcha Latte
Photo by Amy Angelo Photography

Photo by Amy Angelo Photography

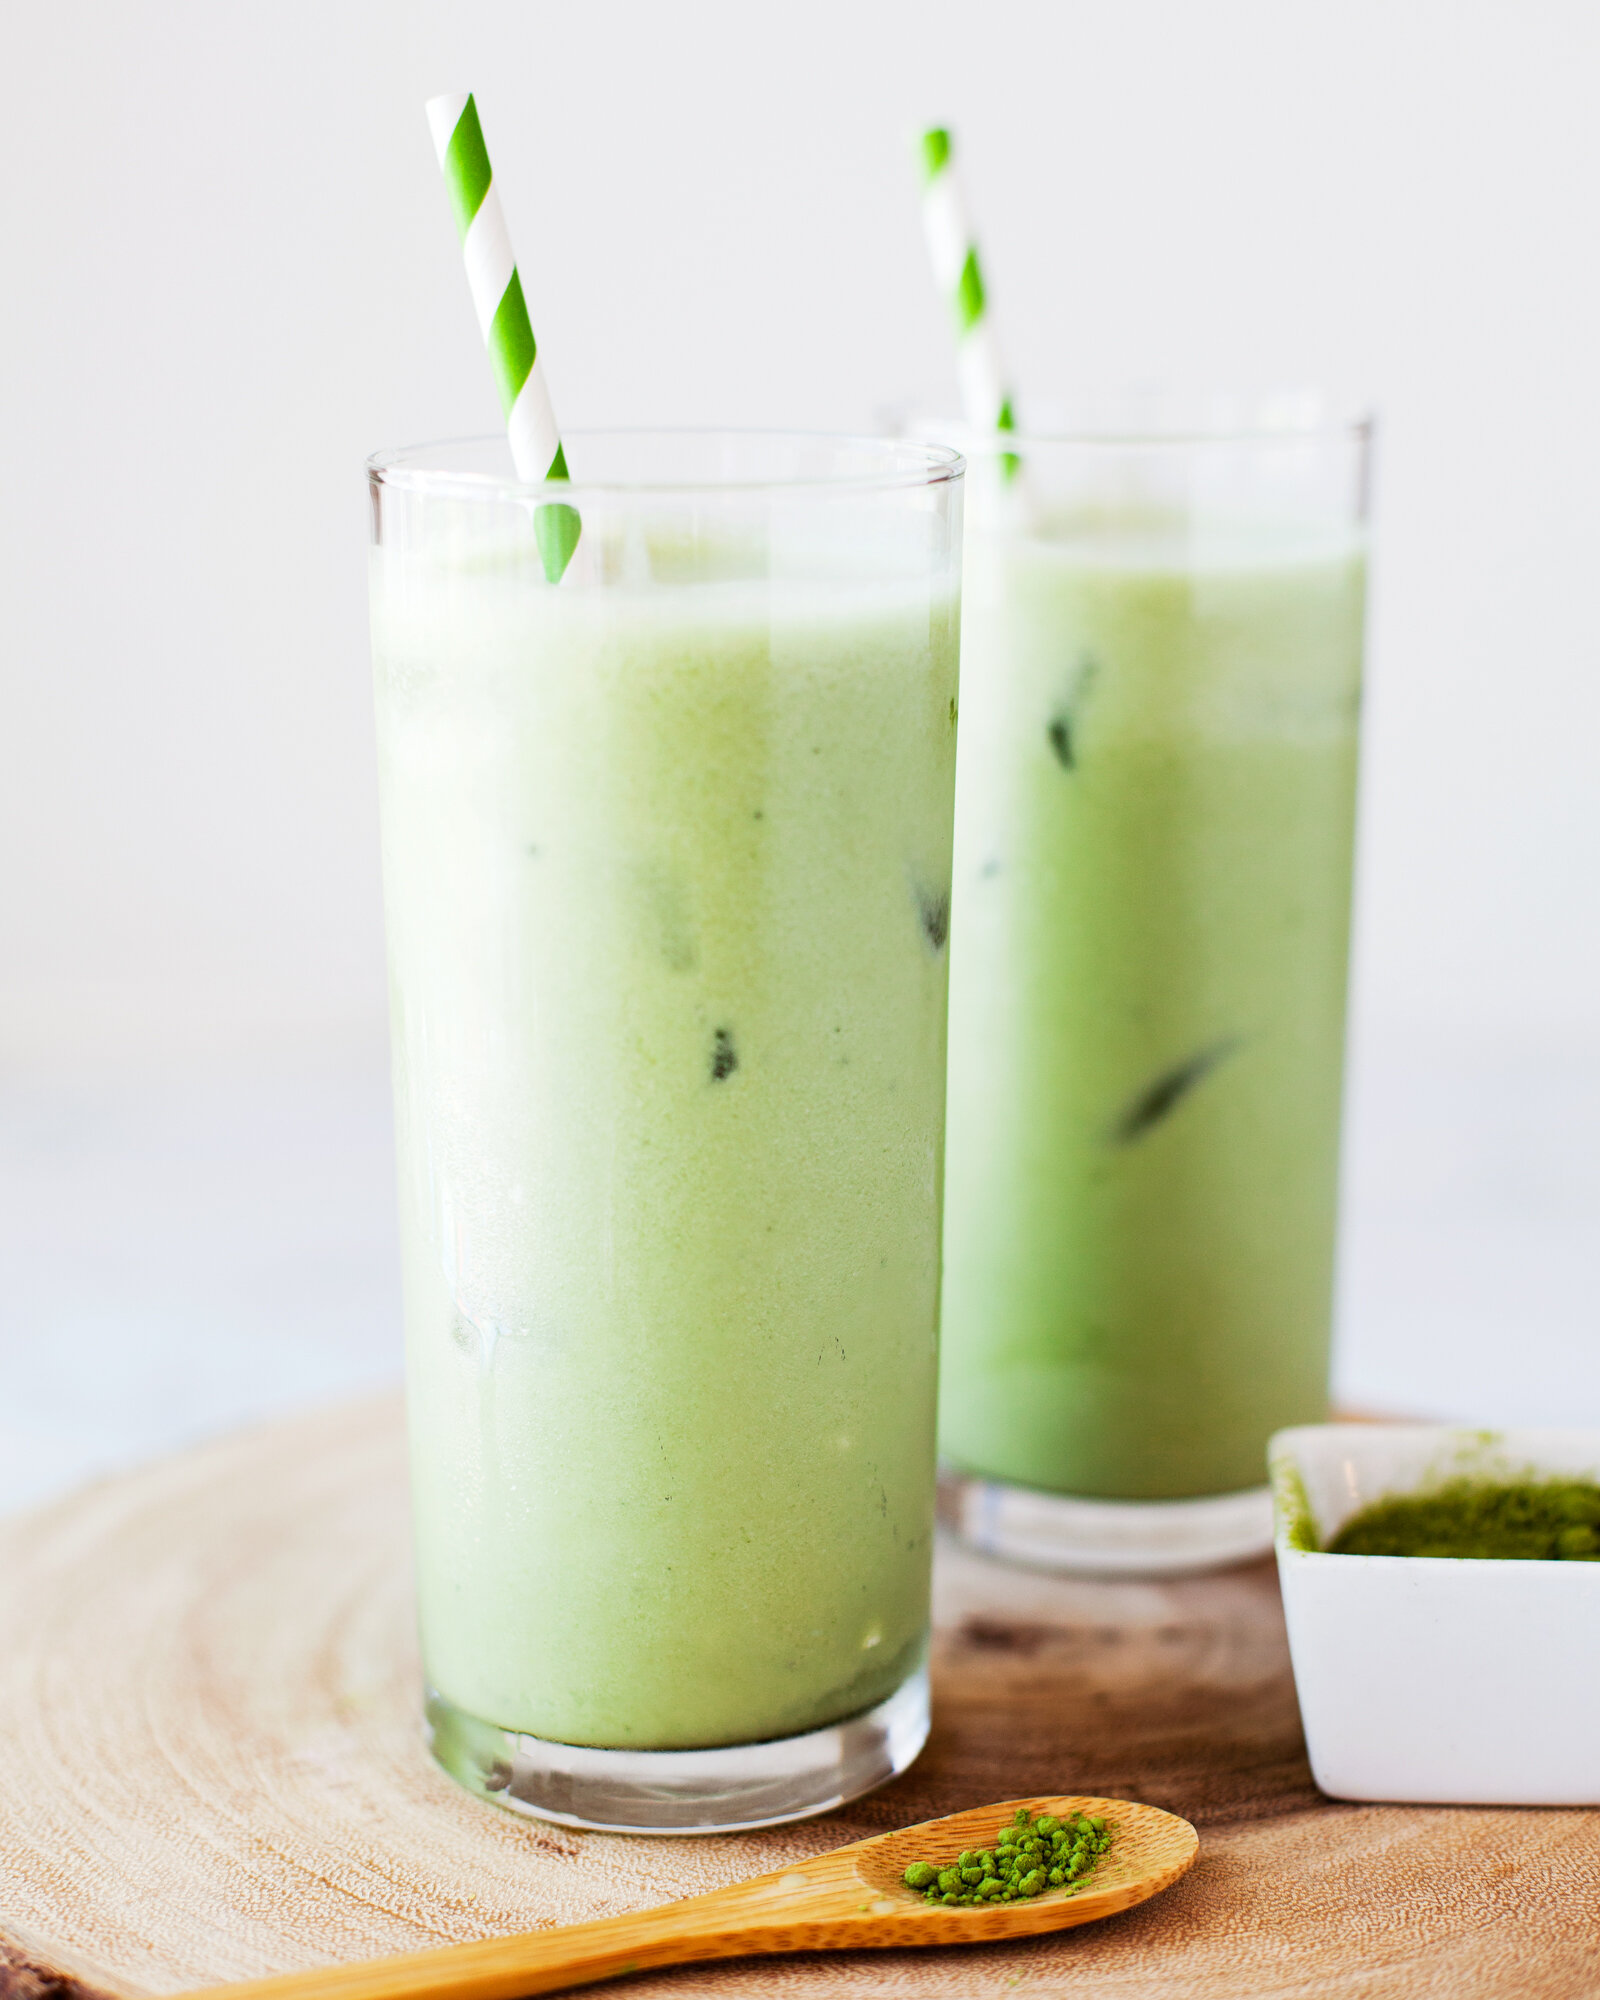
Matcha! It’s just my favorite morning beverage! It’s brimming with antioxidants and doesn’t leave me jittery + dehydrated like another popular morning beverage. . . !

If you’re not familiar with matcha it’s just the green tea leaf in powder form — so you’re essentially consuming the whole leaf as opposed to steeping it. It’s got over double the amount of antioxidants as green tea and is amazing for lowering inflammation and burning fat.

Swap your morning coffee for this iced matcha latte and I think you’ll be pleasantly surprised how delicious it is with just the right amount of caffeine. To make this latte, simply blend your favorite non-dairy milk, canned coconut milk, maple syrup, and vanilla. To make this super food supercharged we add a bit of ashwaganda, a powerful adaptogen that can help you deal with stress and hormonal imbalances. When serving this latte it’s SUPER important to serve over lots of ice for best results!

And all my meal prepping friends, feel free to triple or quadruple this recipe and keep it in the fridge for busy mornings.


Yield: 1 serving

Superfood Matcha Latte

  • ¼ cup canned coconut milk ( I like Thai Kitchen Organic)

  • ¾ cup non-dairy milk of choice (almond, cashew, oat, etc…)

  • ¾ teaspoon matcha powder

  • ¼ teaspoon ashwaganda powder

  • ¼ teaspoon vanilla extract

  • 2 teaspoons maple syrup, or more to taste

  1. Blend all ingredients together until smooth, adjust sweetness as desired.

  2. Serve over LOTS of ice for best flavor.

Photo by Amy Angelo Photography

Photo by Amy Angelo Photography

Katie Farina2Comment
Meal Prep Friendly: Teriyaki Chickpeas with Sesame Broccoli + Rice
Photo by Amy Angelo

Photo by Amy Angelo

Friends! This might be my favorite EASY meal prep dinner! This dish literally comes together in less than 20 minutes hands on time, holds amazing (honestly I think it gets better with age), and is jam packed with nutrition — really a complete + satisfying meal.

Simply saute up some veggies, add cooked chickpeas, coconut aminos teriyaki sauce, let simmer and voila you have the perfect Chinese style take out dish to serve over rice and veggies.

I hope you enjoy this recipe!

Cheers,

katie :)


Yield: 3-4 servings

Teriyaki Chickpeas with Sesame Broccoli + Rice

  • 1 cup grain of choice (quinoa, rice, etc.…)

  • Oil of choice

  • 1 medium red onion, small dice

  • 2 medium carrots, small dice

  • 1 red bell pepper, small dice

  • 1 tablespoon freshly grated ginger

  • 2 (15 ounce) cans of chickpeas, drained + rinsed or 3 cups freshly cooked chickpeas

  • ¾ cup teriyaki coconut aminos or traditional coconut aminos

  • 1 teaspoon toasted sesame oil

  • 2 green onions, finely diced

  • 2 cups blanched broccoli florets, see tips below

  • Optional garnishes: shredded carrots, avocado, snap peas, toasted nuts, sesame seeds, Sriracha drizzle

  1. Cook grain according to package directions.

  2. Heat a medium pot over medium low heat. Once hot, cover the bottom of the pot with oil. Once oil is hot add onion. Sauté until onion is fragrant, about 5 minutes.

  3. Add carrots, bell pepper, and ginger, sauté for an additional 10 minutes or until vegetables start to soften.

  4. Add chickpeas and coconut aminos to pot. Simmer for 30 minutes or until most of the liquid is absorbed. Add toasted sesame oil and green onions. Remove from heat.

  5. Serve chickpeas over cooked grain, blanched broccoli, and desired garnishes.

Chef’s Tips:

Blanching Vegetables: An amazing technique to prep and cook vegetables that will last all week and keep their vibrant color. Add them to salads, stir-fries, or eat them as snacks. Broccoli, cauliflower, carrots, and green beans are all good choices for blanching.

HOW TO BLANCH:

  1. Clean and cut vegetables into desired size. Bring a pot of water large enough to accommodate the vegetables to boil.

  2. Prepare a large bowl with ice and water; set aside.

  3. Add vegetables to boiling water, cook until vegetables are to desired cooked level, I like 1-2 minutes for vegetables like broccoli as I like them to still be a little crunchy.

  4. Drain vegetables and add to ice bath, which will stop the vegetables from continuing to cook and will keep their vibrant color.

  5. After a few minutes in the ice bath, drain and place in Tupperware containers until ready to enjoy.

Photo by Amy Angelo

Photo by Amy Angelo

Katie Farina2Comment
Grain Free Buffalo Cauliflower Wings
Photo by Amy Angelo

Photo by Amy Angelo

Ok so not gonna lie, we eat buffalo cauliflower in our house at least 2 times a week! It’s just both our favorite meal! Even after years, it never seems to get old, and we always fight over the last piece. I wanted to lighten up the traditional buffalo cauliflower and make it into something that you could enjoy regularly and was also ridiculously healthy.

This recipe is so simple! We’re only really battering the cauliflower, baking it (instead of frying) and tossing it in buffalo sauce. You CAN NOT miss dipping it in our herbed ranch dressing too — I could eat this with a spoon it’s so delicious.

Instead of regular flour or even gluten-free flour we’re making it even healthier by using cassava flour — which is made from the root vegetable cassava (also sometimes called yucca). This works great to keep the recipe crunchy, grain-free, and clean eating any time eating approved.

I hope this recipe is loved by your family like it is by mine!

cheers,

katie :)


Yield: 4 servings as an appetizer

Grain Free Buffalo Cauliflower Wings

• 1 medium head of cauliflower, cut into medium sized florets
• Spray oil, like coconut or avocado
• 3/4 cup cassava flour, Otto’s Brand recommended — other brands will not work in this recipe
• 1 1/4 cups water
• Big pinch of salt
• Buffalo sauce of choice, I like Frank’s
• Herbed Yogurt Ranch — see BBQ Jackfruit slider blog post for recipe

  1. Pre-heat the oven to 425. Line a large baking sheet with parchment paper. Spray the parchment paper lightly with oil.

  2. In a large bowl whisk together cassava flour, water, and a big pinch of salt. If the batter is too thick add an additional 1-2 tablespoons water, or until a slightly thick batter is reached — I find this can vary based on the cassava flour batch.

  3. Dip prepared cauliflower florets into batter, gently shaking to get rid of any excess batter. Place onto prepared baking sheet. Finish with remaining florets. Lightly mist the tops of the cauliflower with spray oil.

  4. Bake for 40 minutes, flip and bake for another 20 minutes. Remove from oven and toss with buffalo sauce. Serve with herbed yogurt ranch for dipping (see “BBQ Jackfruit Sliders for the ranch recipe)

MEAL PREP TIP:

Theses cauliflower wings hold up AMAZING! Just bake as usual and for any wings you would like to save for another meal, simply store in a Tupperware container (with out sauce) and refrigerate until ready to enjoy. To re-heat bake at 350 on a parchment lined baking sheet for about 10 minutes and then toss in your desired sauce (Buffalo, BBQ, Terriyaki, etc. . . .) and dip into ranch, which keeps at least 3-4 days.

Photo by Amy Angelo

Photo by Amy Angelo

Katie Farina2Comment
Clean Eating Brownie Batter Milkshake
Photo by Amy Angelo

Photo by Amy Angelo

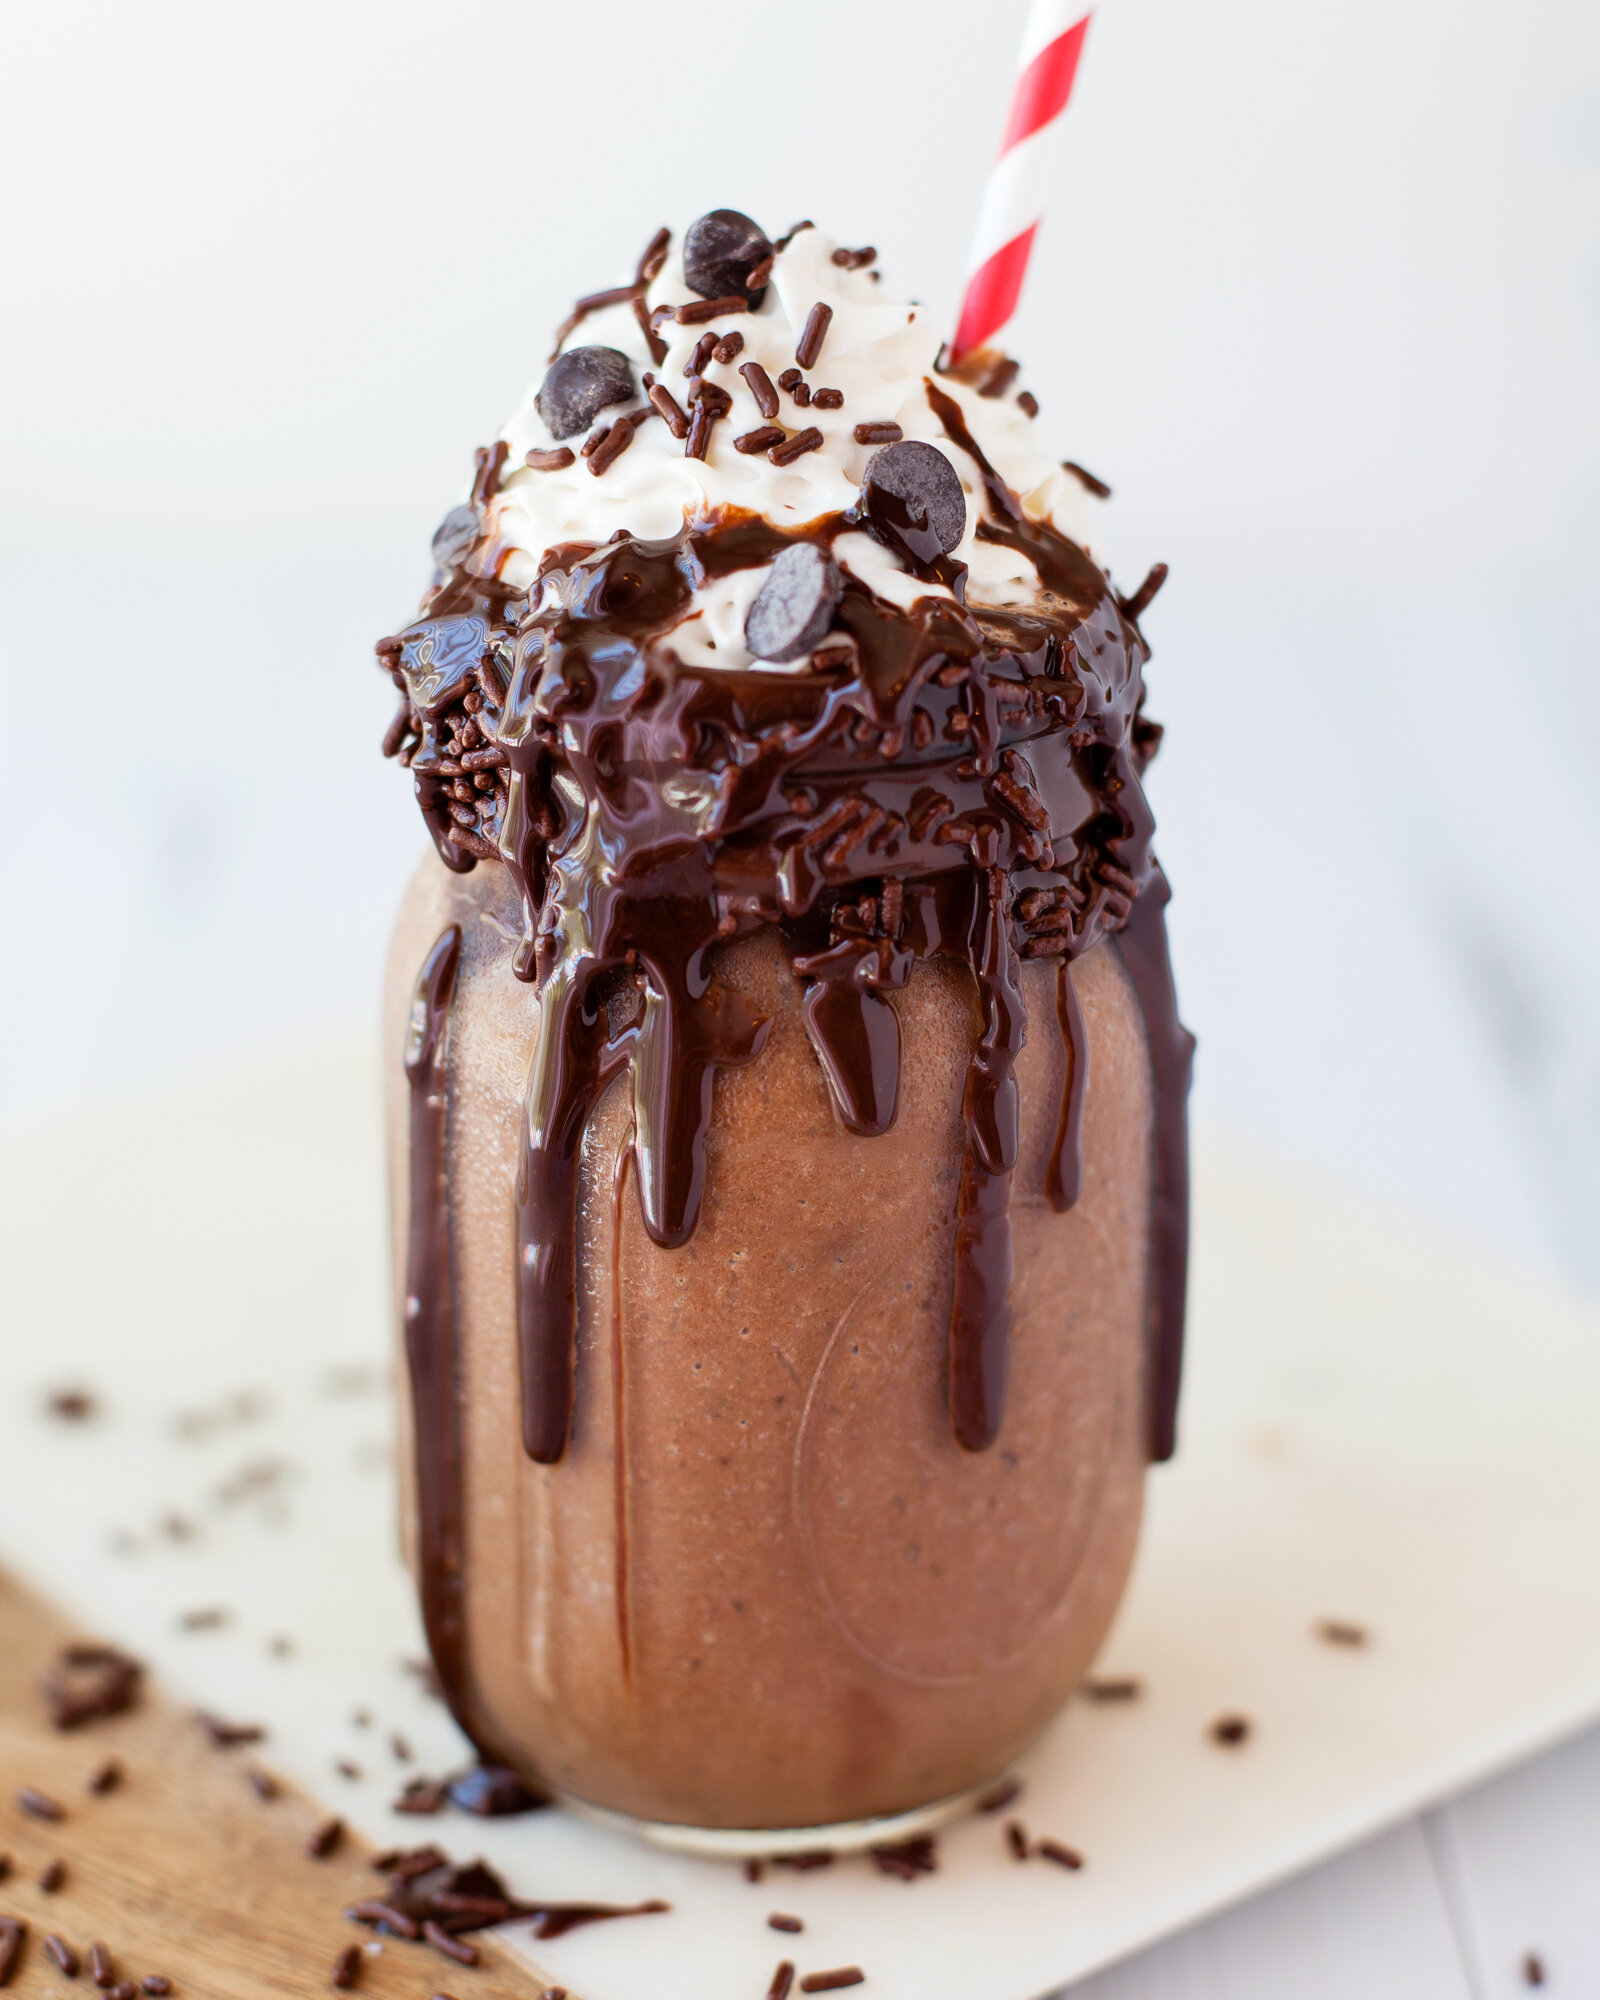
Do you remember those out of control loaded milkshakes from your childhood?!? I dream of those and constantly CRAVE a creamy dreamy milkshake. The one big problem is of course those totally loaded milkshakes are crazy unhealthy and loaded with empty calories … and trust me you can’t just have a sip, you have to have the whole thing! Well enter our clean eating version of your favorite chocolate milkshake, made totally healthy, so healthy in fact you could have it for breakfast! I love it as an afternoon treat though!

We start off with any kind of carton non-dairy milk (like almond, coconut, or cashew), plus a little canned coconut milk for extra creaminess. Then adding a little chocolate protein powder (make sure you like the taste of the protein powder), cacao powder, pitted medjool dates, maple syrup, nut butter, and ice and voila your childhood milkshake dreams come true!

Cheers,

katie :)


Yield: 1 Big Serving

Clean Eating Brownie Batter Milkshake

• 3/4 cup non-dairy unsweetened milk of choice (almond, coconut, cashew)
• 1/4 cup canned coconut milk, or an additional 1/4 cup of non-dairy unsweetened milk of choice for a lighter frostie
• 1 tablespoon chocolate protein powder
• 2 tablespoons raw cacao powder
• 6 medjool dates, pitted, soaked in warm water for 20 minutes if hard
• 1 tablespoon maple syrup
• 1 tablespoon nut butter of choice, (peanut, almond, cashew), optional
• 2 cups ice

1. Combine all ingredients in a high-speed blender until completely blended. Adjust sweetness as desired. Enjoy immediately.

Photo by Amy Angelo

Photo by Amy Angelo

Katie Farina2Comment
Easy Sweet Potato Fries
Photo by Amy Angelo

Photo by Amy Angelo

Every week I usually make some kind of veggie burger or sandwich, whether that’s a fancy pants balsamic glazed portabello panini or store bought frozen veggie burger patties. No matter the handheld, fries are a must to go along with it. And these sweet potato fries don’t disappoint. It’s so simple to make, and you probably have all the ingredients on hand. Happy cooking my friends!

Cheers,

katie :)


Yield: 3 servings

Easy Sweet Potato Fries

  • 2 medium sweet potatoes, cut into even sized fries

  • High heat oil of choice, about 1-2 tablespoons

  • 2 teaspoons garlic powder

  • 1 teaspoon salt, plus more to taste

1. Pre-heat oven to 425. Line a large baking sheet with parchment paper.
2. Toss sweet potatoes in enough oil to coat, mix in garlic powder and salt. Place on prepared baking sheet, being sure to evenly spread out so no fries are touching.
3. Bake for 40-50 minutes, turning every 15 minutes to prevent burning.

*** For a crispier fry feel free to toss the potatoes with about 2 teaspoons of cornstarch or arrowroot starch before baking.

Clean Eating Nachos with Sweet Potato Queso
Photo by Amy Angelo Photography

Photo by Amy Angelo Photography

Celebrate Cinco De Mayo with our Clean Eating Nachos with Sweet Potato Queso!!! These nachos start with our delicious + super easy sweet potato cheese sauce, simply steam or boil sweet potatoes, blend with water, spices + lemon, that's it! Drizzled over your favorite chips, and topped with all the usual suspects: avocado, salsa, black beans, and vegan sour cream and you’re in for a real treat.

Finally nachos you can feel good about!

Cheers :)

katie


Yield: 5 Servings

Clean Eating Nachos with Sweet Potato Queso

  • 3 cups cubed orange sweet potatoes, with skin on

  • 1 cup water

  • 1/2 cup nutritional yeast

  • 2 cloves of garlic

  • Juice of half a lemon, or more to taste

  • 1 1/2 teaspoons of salt, or to taste

  • 1 large bag your choice of chips

  • Optional toppings: black beans, avocado/guacamole, salsa, vegan sour cream, cilantro, green onion, lime wedges

1. Steam or boil sweet potatoes until completely tender and soft, this takes about 20 minutes. Drain and place cooked sweet potatoes in a blender. Add water, nutritional yeast, garlic, lemon juice, and salt. Blend until completely smooth and warm, adjusting flavor as desired.
2. Place chips on a platter, drizzle with cheese sauce and garnish with desired toppings.

Chef’s Notes:

*** This cheese sauce holds well in the fridge, just store in a Tupperware container and when ready to enjoy gently warm over low heat.

Sprouted Lentil + Vegetable Breakfast "Sausage" Sandwich
Photo by Amy Angelo Photography

Photo by Amy Angelo Photography

I love love love this breakfast sandwich because it’s jam packed with nutrients, fiber, and protein and tastes AMAZING. Unlike traditional breakfast sandwiches it won’t weigh you down but will actually give you so much energy. As an added bonus it’s soy-free and naturally packed with vegetables.

These patties are so easy to make. Simply cook sprouted lentils (amazing source of protein, fiber, and iron and the sprouting process makes it easier to digest + absorb the powerful nutrients), saute up some onion + spices, and combine the two mixtures with bread crumbs, pre-cooked brown rice and pulse into a downright delicious mixture that can then be formed into breakfast sausage like patties. Fry em up and stuff em in the most perfect breakfast sandwich you can feel good about.


Yield: 6 Sandwiches

Sprouted Lentil + Vegetable Breakfast “Sausage” Sandwich

  • 3/4 cup sprouted lentils (I like Tru Roots brand)

  • 1 tablespoon olive oil

  • 1 yellow onion, small dice

  • 1 teaspoon fennel seeds

  • Pinch of chili flakes

  • 1 cup greens, (spinach, kale, etc . . .) loosely chopped

  • 1 cup cooked brown rice, cooled (see chef’s notes below)

  • 1 tablespoon coconut flour

  • 1 tablespoon coconut aminos

  • 1/2 cup bread crumbs, gluten-free if desired

  • 1 - 1 1/2 teaspoons of salt, or to taste

  • Refined coconut oil, for frying patties

  • English muffins, gluten-free if desired

  • Vegan cheese sauce, I like the “Go-to Cheese Sauce” from my cookbook or any vegan cashew cheese sauce would work great (see chef’s notes below)

  • 2 ripe avocados, sliced

  • Handful of spinach, optional for sandwich assembly

  1. Cook lentils according to package directions. Set aside to cool.

  2. Heat a large non-stick pan over low heat, once hot, cover the bottom of the pan with olive oil. Once oil is hot add onion, fennel seeds, and chili flakes. Saute until onion is translucent, about 15 minutes, then add greens, saute until wilted 1-2 minutes.

  3. Add cooled lentils, sauteed vegetable mixture, cooked brown rice, coconut flour, coconut aminos, bread crumbs, and salt to a food processor. Process until a nice thick dough is created, this will take about 2 minutes. Being sure to stop the machine to scrape the mixture back down to the blades. Season to taste.

  4. Using an ice cream scoop or half cup measuring spoon tightly form into desired size patties. To keep the mixture from crumbling be sure to tightly squeeze mixture together. Place patties on parchment lined plate or baking sheet. Place in the freezer for 30 minutes to solidify.

  5. After 30 minutes, remove patties from freezer. Heat a large non-stick skillet over medium high heat. Cover with refined coconut oil (about 2 tablespoons). Once oil is hot add patties, fry for 4-5 minutes on each side. Drain on a paper towel lined plate.

  6. To assemble breakfast sandwiches: Toast English muffin, smear both sides with vegan cheese sauce, top with sausage, avocado, and greens. Enjoy immediately!

Chef’s Notes:

*** This is a great recipe to use up any leftover cooked brown rice you might have, maybe from dinner the night before. If you don’t have prepared brown rice, using microwaved brown rice or bagged brown rice is a great way to save time and avoid the hassle of cooking brown rice just for this recipe.

*** Depending on your bread crumbs you might have to add more as not all brands of bread crumbs work the same. If you find your patties are not sticking together, add up to 1/4 cup more bread crumbs, starting with 1 tablespoon at a time.

*** Freezing the patties will give them a nice sear + will stop them from falling apart. I like to freeze them for 30 minutes, but in a pinch 15-20 minutes should do the trick.

*** If you don’t have time to make a vegan cheese sauce, sriracha mixed with a little vegan mayo makes a great stand in.

Katie FarinaComment
Clean Eating Turmeric Lemonade
Photo by Amy Angelo

Photo by Amy Angelo

The weather is finally starting to warm up! To me warm weather screams for lemonade. We’ve taken a spin on traditional lemonade and added our favorite superfoods (turmeric + ginger) and lightly sweetened it with maple syrup for the perfect refreshing lemonade you can feel good about it.

I hope you love it as much as we do!

Cheers,

katie :)


Yield: 2-3 servings

Turmeric Lemonade

• 1/4 cup maple syrup, or more to taste
• 1 teaspoon ground turmeric
• 1/3 cup fresh lemon juice
• 1 1/2 cups water or sparkling water
• 1 inch piece of ginger, peeled + thinly sliced
• 1 lemon, sliced thinly

1. Combine maple syrup and turmeric together in a pitcher until a paste is reached. Add lemon juice and water, stir to combine.
2. Place sliced ginger + lemon in pitcher. Refrigerate for a few hours to chill.
3. Remove ginger + lemon pieces. Serve over ice.

*** For best flavor be sure to drink ice cold!

Katie FarinaComment
Gluten-Free Banana Waffles with Cinnamon Butter
Photo by Amy Angelo

Photo by Amy Angelo

All your gluten-free waffle dreams come true with these beauties! These gorgeous golden brown waffles come together so easily and are amazing for meal prep. I often freeze them and re-heat them just like traditional toaster waffles — but much healthier + even more delicious! Make sure you top the waffles with copious amounts of cinnamon butter and fruit for the yummiest breakfast.


Yield: About 6 Waffles

Gluten-Free Banana Waffles with Cinnamon Butter

  • 2 ripe bananas, mashed

  • 1 ½ cups Bob’s Red Mill Gluten-Free 1-to-1 Baking Flour (in the blue bag)

  • 2 tablespoons coconut flour

  • 1 tablespoon coconut sugar

  • 1 tablespoon baking powder

  • ½ teaspoon baking soda

  • Big pinch of salt

  • 1 ½ cups non-dairy milk, at room temperature

  • ¼ cup coconut oil, melted

  • 2 tablespoons chia seeds

  • Coconut spray oil

  • Optional Garnishes: Cinnamon butter (see recipe below), maple syrup, fresh fruit

  1. Pre-heat waffle iron to medium high heat – this is very important; the waffle iron needs to be at a higher temperature for the waffles to not stick together.

  2. In a small bowl mash together bananas using a fork until slightly pureed.

  3. In a large bowl whisk together gluten-free flour, coconut flour, coconut sugar, baking powder, baking soda, and salt.

  4. Add milk and coconut oil to flour mixture. Mix until nice batter is formed, add in reserved banana. Fold in chia seeds, let batter sit for 5 minutes for chia seeds to be absorbed slightly.

  5. Thoroughly spray waffle iron with coconut spray oil. Scoop about ¾ cup of  waffle mixture into pre-heated iron. Being sure not to overfill. Completely close waffle iron, essentially sealing.

  6. Cook until nicely golden brown, my waffle maker takes about 5 minutes per waffle. Gluten-free waffles can be tricky if your waffle iron says it’s done after a few minutes check it because it might need longer. Serve with desired toppings.

    *** Be sure to read Chef’s notes below for more preparation tips.

Cinnamon Butter

  • ¼ cup vegan butter, slightly softened (I like @miyokos)

  • 2 tablespoons coconut sugar

  • ½ teaspoon cinnamon

  • ¼ teaspoon salt

Mix together until a nice paste is formed, spread on waffles, pancakes, or any baked good.

  • Do not overfill waffle iron — only use about 3/4 cup of batter, if overfilled they will not cook properly.

  • If the waffle is coming apart when you open the waffle iron, be sure you’re giving it enough time to cook + that the waffle iron is completely shut when cooking.

  • Gluten-free waffles can be really tricky, for this recipe I don’t recommend making any flour substitutions.

Katie Farina2Comment
Turmeric Latte Chia Pudding with Butternut Squash
Photo by Amy Angelo

Photo by Amy Angelo

I love love love chia pudding, and this recipe might just be my favorite! We took all the beautiful flavors of turmeric latte and made it into an easy chia pudding. To make it even better we sneak in a serving of butternut squash, to make this dessert, more nutritious, but also thicker and more bright orange in color.

This recipe is so simple to put together, simply steam or boil butternut squash (which can be frozen — don’t be a hero) and blend that with beautiful healing spices, non-dairy milk, maple syrup, and vanilla. Then simply whisk in the chia seeds and let it sit in the refrigerator for a few hours to thicken + chill.

This makes a great dessert, but also a perfect breakfast. I like to portion it into mason jars to have breakfast meal prepped for the week.

Happy Cooking!

katie :)


Yield: 6 Servings

Turmeric Latte Chia Pudding

  • 1 cup peeled butternut squash, cubed, can be frozen

  • 1 cup non-dairy unsweetened milk of choice (almond, coconut, cashew)

  • 1x13.5 ounce can coconut milk (Thai Kitchen brand recommended, do not use Trader Joe’s brand)

  • 1/2 cup maple syrup

  • 2 teaspoon ground cinnamon

  • 2 teaspoons ground turmeric

  • Pinch black pepper

  • 1 teaspoon vanilla extract

  • 1/2 cup chia seeds

  1. Boil or steam butternut squash until completely soft, about 15 minutes.

  2. Combine cooked squash with remaining ingredients except chia seeds in a blender. Blend until completely smooth, about 1 minute.

  3. Pour liquid into a large bowl or tupperware container. Whisk in chia seeds. Store in the refrigerator for at least 4 hours before serving. Thoroughly whisk again before serving. 

Katie Farina2Comment
Spanish Cauliflower Rice + Black Bean Burritos
Photo by Amy Angelo

Photo by Amy Angelo

The perfect rice and bean burritos, so simple yet so delicious, easy, and healthy! The cauliflower rice is the star of this burrito. We start by making a super simple cauliflower rice. To give the dish the flavor and texture of rice we use half basmati rice and half cauliflower rice. I find straight up cauliflower rice not to be appetizing, so this is the perfect mix to get more nutrition out of your rice with out compromising on flavor. This rice holds well so feel free to make a big batch and eat it through out the week, it’s also a great side dish to any Mexican meal. This is a great clean out the fridge meal too, use up any odds and ends, like roasted vegetables, lettuce, or potatoes. Happy cooking my friends!


Yield: 4 burritos

Spanish Cauliflower Rice + Black Bean Burritos

  • Olive oil

  • 1 small yellow onion, small dice

  • 2 garlic cloves, minced

  • 1 teaspoon chili powder

  • 1 (12 ounce) jar of mild salsa (Trader Joe’s “Salsa Authentica” recommended)

  • 1 1/4 cups water

  • 1 cup white basmati rice

  • 1 cup frozen cauliflower rice (Costco or Trader Joe’s recommended)

  • 1/2 cup frozen peas

  • Juice of 1/2 lime, or more to taste

  • Salt to taste, about 1 teaspoon

  • 1 (15 ounce) can black beans, rinsed + drained, or 1 1/2 cups freshly cooked

  • Your favorite burrito size tortillas

  • Any other burrito fillings: avocado, salsa, potatoes, roasted veggies, etc . . .

1. To prepare the cauliflower rice: Heat a medium pot over low heat. Once hot, cover the bottom of the pan with olive oil. Once oil is hot, add onion and garlic. Sauté until onion is translucent and starting to caramelize, about 20 minutes.  Add chili powder; sauté another minute. Add salsa, water, basmati rice and cauliflower rice to pot. Bring to a gentle simmer and cover.  Cook for 20 minutes or until all the liquid is absorbed. In the last few minutes of rice cooking, add frozen peas. Remove rice from heat.  Add lime juice and salt to taste.

2. Gently warm tortilla in a panini press or microwave until soft + pliable. Fill with prepared cauliflower rice, beans, and any other desired fillings. Roll up and enjoy.

Katie FarinaComment
Chocolate Banana Chia Pudding
Photo by Amy Angelo

Photo by Amy Angelo

Here’s the perfect chocolaty treat you can feel good about! This chia pudding is ridiculously easy, in fact it comes together in less than 10 minutes! Simply blend all ingredients (except chia seeds) into a delicious milkshake like mixture. Whisk in chia seeds and place in the fridge for a few hours. And voila you’ll have a beautiful decadent chia pudding, full of antioxidants, fiber, and protein. Most of the sweetness from this recipe comes from the ripe banana, making it a great treat that won’t spike your blood sugar as much as a traditional dessert.

This makes an incredible breakfast, I like to serve with sliced bananas and granola or as a special treat with a little coconut whipped cream. No matter how you serve it I’m sure it’ll please everyone on your list.

Chocolate Banana Chia Pudding

Yield: 6 servings

  • 1 (13.5 ounce) can coconut milk, do not use Trader Joe’s brand — it will not work in this recipe, I like Thai Kitchen Organic

  • 1 cup non-dairy unsweetened milk (almond, coconut, cashew, etc . . . )

  • 2 RIPE bananas, you want them to have brown spots on them

  • 1/4 cup raw fair trade cacao powder

  • 1/4 cup maple syrup

  • 2 tablespoons SALTED peanut butter, cashew butter, or almond butter

  • 1 teaspoon vanilla extract

  • Pinch of salt

  • 1/2 cup chia seeds

  1. Blend together all ingredients EXCEPT chia seeds. Taste mixture, adjust sweetness/flavor as desired.

  2. Pour mixture into a large bowl or Tupperware container, whisk in chia seeds. Store in the fridge for 2 hour or more before serving.

    *** Will last 4-5 days in the refrigerator.

  • Do not use Trader Joe’s brand coconut milk in this recipe, it has no stabilizers and the chia pudding will not set up correctly. I like Thai Kitchen organic brand or Whole Foods brand coconut milk.

  • Be sure to use super ripe bananas, that’s where the sweetness of the pudding is come from, if you’re bananas are not ripe the pudding will not be sweet.

Katie FarinaComment
Raw Superfood Chocolate Tart
Photo by Amy Angelo

Photo by Amy Angelo

Here’s a super easy chocolate tart, sure to impress every guest on your list. I timed myself when making this and it took me less that 30 minutes from start to finish … including the dishes! A decadent and beautiful dessert doesn’t mean you have to spend hours in the kitchen!

We start off with a simple whole foods based crust made from nuts and dates. Simply combine everything in a food processor until a nice slightly sticky dough is created — this will take 1-2 minutes. Once a nice dough is formed, pack into a lined muffin tin. Next up comes the luxurious chocolate filling. It tastes decadent and rich but is made of ingredients you probably already have in your pantry. Simply whisk together melted coconut oil, maple syrup, raw cacao powder, vanilla, and salt. Pour into tart shells and pop in the refrigerator until ready to use. Feel free to garnish with any superfoods you have on hand.

In this recipe we’re essentially making our own chocolate ganache from scratch. The superstar is of course the raw cacao powder — not to be confused with cocoa powder. Raw cacao powder is RAW meaning it has not been heated at high temperatures or gone through excessive processing. Raw cacao has over double the amount of antioxidants as cocoa powder and 40X the amount of antioxidants as blueberries. It’s also a great source of magnesium, plant based iron, and can even help lower blood pressure — yes please! When ever buying raw cacao it’s really really important to buy fair trade or ethically traded cacao (that goes for any kind of chocolate). The fair trade symbol ensures that the person who grew the cacao beans were paid a living wage. Sadly lots of cacao farmers are mistreated and unfortunately child slavery is a huge problem. Do not fear, there’s amazing fair trade chocolate companies, Navitas Naturals, Theo, and Guittard are a few of my favorites — all of which you can find in any health food store.


Raw Superfood Chocolate Tart

Yield: 7-8 tarts

Crust:

  • 1 cup walnuts, pecans, or macadamia nuts

  • 1 cup medjool dates, pitted, if super hard soak in warm water for 20 minutes + drain

  • 1 teaspoon vanilla

  • Salt to taste (about 1/2 teaspoon)

Chocolate Filling:

  • 1/3 cup coconut oil, melted, see Chef’s Notes

  • 1/3 cup maple syrup, at room temperature, see Chef’s Notes

  • 1/3 cup cacao powder

  • 1 teaspoon vanilla extract

  • Big pinch of salt

  • Optional Garnish: Coconut flakes, goji berries, cacao nibs, hemp seeds, chopped nuts

  1. Crust: line a cupcake pan with paper liners (this recipe makes 7-8 tarts). In a food processor combine all the crust ingredients and puree until a nice dough forms — this takes about 1 to 2 minutes, being sure to stop the machine and scrape the mixture. You’re looking for the nuts + dates to be almost completely broken down, little bits of dates/nuts are ok you just don’t want large chunks. Once a dough is formed, scoop about two tablespoons of mixture into each prepared muffin liner. Mold dough using your fingers into a tart shell around paper liner, going about 1/2 way up the liner .

  2. Chocolate Filling: Whisk together coconut oil, maple syrup, cacao powder, vanilla, and salt until nice uniform syrup is created. Pour chocolate into each tart shell.

  3. Garnish with optional superfoods. Place in fridge for 2-3 hours to set up. Enjoy chilled.

    *** Will last 4-5 days covered in the refrigerator.

  • When pureeing the crust, you want the dates + nuts to break down almost completely but not so much that the nuts release all their oil, you’re looking for the consistency of a larabar or other nut + dried fruit bar.

  • It’s very important that you coconut oil is melted and your maple syrup is at room temperature. If the maple is cold when it hits the melted coconut oil the mixture will become grainy and harden as opposed to a nice chocolate syrup consistency.

Katie FarinaComment
Veggie Loaded Chili Lime Jackfruit "Carnitas" Taquitos
Photo by Amy Angelo

Photo by Amy Angelo

In high school, my sister and I after school would go to our favorite taco stand and get totally loaded taquitos, dripping in cheese + sour cream, it was out tradition! Oh how far I’ve come! This is a take on traditional taquitos made much healthier. We’ve swapped out the meat for home-made jackfruit carnitas, that’s unbelievably easy to make. Roll it in a warm tortilla and crisped up in a little high heat oil and you won’t even miss the other ones. Enjoy taquitos while not compromising on your health goals!


Veggie Loaded Chili Lime Jackfruit “Carnitas” Taquitos

Yield: 10-12 taquitos

  • Olive oil

  • 1 medium red onion, small dice

  • 2 garlic cloves, minced

  • 1 (20 ounce) can jackfruit in brine, drained + rinsed, available at Trader Joe’s 

  • 2 teaspoons chili powder

  • Juice of 2 limes

  • Juice of 1 medium orange

  • 1 cup shredded carrots

  • 2 cups baby spinach, loosely packed

  • Salt to taste (about 1 teaspoon) 

  • Siete tortillas (available at Sprouts or Whole Foods) or corn tortillas 

  • Refined coconut oil or avocado oil, for frying taquitos

  1. Heat a large non-stick sauté pan over medium low heat. Once hot cover the bottom of the pan with oil. Once oil is hot add onion and garlic. Sauté until translucent and starting to caramelize - about 20 minutes.

  2. Meanwhile pulse jackfruit in food processor until crumbly, about 30 seconds or loosely chop into small bite size pieces. You’re looking for it to be the consistency of traditional pulled meat.

  3. Add jackfruit to onion mixture, then add chili powder, lime juice, orange juice, and shredded carrots. Sauté for 20 minutes or until lightly browned and juices are absorbed. Add spinach, sauté until wilted, 1-2 minutes. Salt to taste.

  4. Gently warm tortillas until soft and bendable, see chef’s tips below. Fill with about 2 tablespoons of mixture into tortilla, roll up tightly, repeat with remaining tortillas.

  5. Heat a large non-stick sauté pan over medium high heat. Cover the bottom of the pan with oil, once oil is hot, add taquitos (in 2 batches) seam side down, fry for 2-3 minutes on each side. Drain on a paper towel lined plate.

  1. Be sure to use jackfruit packed in brine and not in syrup.

  2. It’s extremely important to warm your tortillas before adding jackfruit filling. If your tortillas are cold and not pliable, they will crack in the rolling/cooking process. The best way to heat them up is on a panini press for about 20 seconds or in the microwave wrapped in damp paper towels for 30 seconds.

Photo by Amy Angelo

Photo by Amy Angelo

Katie FarinaComment