Cauliflower Scramble

Photo by Amy Angelo

Move over tofu scramble there’s a new option in town. My family is TOTALLY OBSESSED with this scramble, I love serving it with sweet potato hash + toast or stuffed into a drool worthy breakfast burrito. The best part is you can easily use frozen cauliflower (I often do) to make this recipe come together in a matter of minutes. It’s perfect for meal prepping too.

Cheers,

katie :)


Yield: 4 servings

Cauliflower Scramble

  • 1 medium head of cauliflower, cut into super small pieces OR 2 (12 ounce bags) frozen cauliflower (no need to cut)

  • Olive oil (about 2-3 tablespoons)

  • 1 large shallot or ½ small yellow onion, small dice

  • 1 teaspoon turmeric

  • 1/3 cup nutritional yeast (or more to taste)

  • Optional add ins: handful baby spinach, mushrooms, green onions, bell peppers, etc…

  • Salt, pepper, chili flakes to taste

  1. Boil cauliflower in a pot of rapidly boiling water for 10 minutes or until really soft, drain and set aside.

  2. Heat a large non-stick skillet over medium low heat. Cover the bottom of the pan with a generous amount of olive oil. Once hot add shallot. Sauté until starting to caramelize, about 15 minutes.

  3. Add turmeric to pan, mix to incorporate spice into oil.

  4. Add boiled cauliflower, sauté for 20 minutes or until cauliflower is starting to get golden, stirring often and using your spoon to break up cauliflower. Adding optional add ins if desired.

  5. Add nutritional yeast and salt to taste.

Photo by Amy Angelo

Katie Farina2Comment
Clean Eating Fro Yo

Photo by Amy Angelo

In college my friends and I would frequent this little fro yo shop in town. We’d get mountains of fro yo with all the toppings. I wanted to take that same concept and make it something truly healthy while still being totally delicious. I hope you try this easy and fun recipe …. and make sure you pile it high with all your favorite toppings.

If you make this recipe we would LOVE if you tag us on instagram @katieshealingkitchen

Cheers,

katie :)


Yield: 1 big serving

Clean Eating Fro Yo

  • 1 ½ frozen bananas, cut into bite size chunks

  • 1 (5 ounce) container plain unsweetened yogurt of choice scooped into an ice cube tray and frozen.

  • ½ cup non-dairy milk of choice (almond, cashew, coconut, etc…)

  • 1 teaspoon vanilla extract

  • Toppings of choice: fruit, sprinkles, chocolate chips, crushed cookies/brownies, chocolate syrup, crushed nuts, etc…)

ADVANCE PREP: Freeze banana chunks + freeze yogurt in ice cube tray until completely solid.

  1. Let banana slices and frozen yogurt ice cubes sit at room temperature for 15 minutes.

  2. Add bananas, frozen yogurt cubes, non-dairy milk, and vanilla to a blender. Blend until completely smooth, this might take 1-2 minutes, using a tamper to smoosh ingredients down. If you don’t have a high speed blender you might need to add a few more splashes of milk to blend.

  3. Scoop into bowls and top with desired toppings.

Katie Farina2Comment
Peanut Butter Cup Chia Pudding
Photo by Amy Angelo

Photo by Amy Angelo

We’re taking everyone’s favorite combo chocolate + peanut butter and making it into a totally indulgent but healthy crave worthy dessert. Trust me this will definitely conquer the craving for that very popular candy . . .

Cheers,

katie :)


Yield: 4 servings

Peanut Butter Cup Chia Pudding

Peanut Butter Cup Chia:

  • 1 cup non-dairy unsweetened milk of choice (almond, coconut, cashew, etc.)

  • 1 can full fat coconut milk

  • ¼ cup + 2 tablespoons maple syrup

  • 2 heaping tablespoons salted peanut butter

  • 1/8 teaspoon salt

  • ½ cup chia seeds

Raw Chocolate Drizzle:

  • 2 tablespoons raw fair-trade cacao powder

  • 2 tablespoons coconut oil, melted

  • 1 tablespoon maple syrup, at room temperature

  • Pinch of salt

Optional Garnishes:

  • Chopped peanut butter cups

  • Chopped salted peanuts

  • Chocolate chips

  1. Peanut Butter Chia Pudding: Blend all chia pudding ingredients together, except chia seeds. Pour into a bowl or large Tupperware container. Whisk in chia seeds. Place in the refrigerator for a few hours to set, thoroughly whisk again before serving.

  2. Raw Chocolate Sauce: Whisk together all ingredients until smooth.

  3. Chia Pudding Parfait Assembly: Portion into cups/glasses drizzle with raw chocolate sauce and finish with any optional garnishes.

Photo by Amy Angelo

Photo by Amy Angelo

Katie Farina2Comment
Cheesy Caramelized Onion + Veggie Loaded Skillet Pasta
Photo by Amy Angelo

Photo by Amy Angelo


Yield: 4 servings

Cheesy Caramelized Onion + Veggie Loaded Skillet Pasta

  • ¼ cup olive oil (measure it!)

  • 1 large yellow onion, cut into thin half moons

  • 2 cups marinated jarred artichoke hearts, loosely chopped (Costco or Trader Joe’s has this)

  • 1 cup oil packed sun-dried tomatoes, loosely chopped if whole

  • 1 (12 ounce) box gluten-free pasta of choice, I like @jovial

  • 1/4 - 1/2 cup pasta water

  • ¼ cup nutritional yeast

  • 1 teaspoon salt, or to taste

  • 3 cups baby spinach

  • 1 bunch fresh basil, loosely chopped or torn

  1. Heat a large non-stick sauté pan over medium low heat. Once hot add olive oil, once oil is hot add onion. Let cook, stirring often for 30 minutes.

  2. Add artichoke hearts and sun-dried tomatoes to onions. Sauté another 5 minutes.

  3. Meanwhile cook pasta according to directions, reserving a bit of pasta water.

  4. Add cooked pasta to onion mixture, adding a bit of pasta water to loosen the sauce a bit (up to ½ cup), then add nutritional yeast, salt and spinach, mix until spinach is just wilted but still bright green. Remove from heat and salt to taste. Garnish with basil.

Photo by Amy Angelo

Katie FarinaComment
Meal Prep Skin Brightening Berry Smoothie Bag
Photo by Amy Angelo

Photo by Amy Angelo

If you’re anything like me mornings can be particularly stressful, breakfast can seem like the last thing on my list . . . which I normally regret! Here’s the perfect solution for busy mornings, smoothie bags! I love smoothie bags. I always add this to my weekly meal prep routine. It’s so easy to just set up an assembly line so you don’t miss out on any goodies. This is an especially amazing smoothie bag combination as it’s bursting with antioxidants and healthy fats perfect for beautiful glowing skin.

PLEASE SAVE this recipe + TAG us @katieshealingkitchen on instagram if you try it!


Yield: 1 smoothie bag (which makes 2 servings)

Meal Prep Skin Brightening Berry Smoothie Bag

  • ½ cup frozen raspberries

  • ½ cup frozen wild blueberries

  • ½ cup frozen cherries

  • ½ frozen acai pack, broken up into chunks

  • ½ - 1 frozen banana, cut into chunks

  • ½ cup frozen spinach

  • 1 tablespoon hemp seeds

  • FOR BLENDING: 1 ½ cups liquid of choice (non-dairy milk or coconut water)

Add all ingredients (except liquid) to a sandwich size plastic baggie or reusable baggie. Press out any air and store in the freezer until ready to enjoy.

FOR BLENDING: Take your smoothie bag out of the freezer 15 minutes before you’re ready to enjoy to let thaw on the counter at room temperature. Then add your choice of liquid with the contents of the bag to a blender and blend until smooth.

*** It’s SUPER IMPORTANT to let your smoothie bag thaw at room temperature for 15 minutes before blending, if you skip this step it will be too frozen to blend and you’ll have to add more liquid to the blender, diluting the flavor.

Katie Farina2Comment
Clean Eating Sweet Potato Quesadillas
Photo by Amy Angelo

Photo by Amy Angelo


Yield: 4 quesadillas

Clean Eating Sweet Potato Quesadillas

  • 1 large orange sweet potato, cut into medium chunks with skin on

  • 1-2 tablespoons olive oil

  • 2 cloves garlic, finely minced

  • 1 large bunch curly leaf kale, de-stemmed + loosely chopped

  • Juice of ½ -1 lemon (depending on preference)

  • 1 tablespoon nutritional yeast

  • Salt to taste

  • 4 tortillas, I like the brand “Food For Life” brown rice variety

  • 1 (16 ounce) can refried beans

  • High heat oil for frying quesadillas, I like coconut or avocado

  • Salsa, Chipotle Crema, Vegan Sour Cream, Guacamole, or Hot sauce for serving

  1. Steam or boil sweet potato until completely soft, about 15 minutes. Drain and set aside

  2. Heat a large non-stick pan over medium low heat. Once hot add oil. Once oil is hot add garlic, let sauté until fragrant, 2-3 minutes.

  3. Add kale to sauteing garlic, let cook for 1 minute then add lemon juice, nutritional yeast and a big pinch of salt. Continue to sauté until kale is completely wilted, 2-3 more minutes. Salt to taste.

  4. Gently warm tortillas until soft and pliable (you can do this in a dry skillet, microwave, or panini press). Spread ¼ of the beans on the tortilla, leaving about ¾ of an inch border around the tortilla with no beans. Top with sauteed kale. Place a few potatoes over the kale and gently smoosh. Fold tortilla over so it looks like a half moon – repeat process with remaining 3 tortillas.

  5. Re-heat same non-stick skillet over medium high heat. Once hot add a splash of high heat oil to the bottom of the pan. Once oil is hot add 2 quesadillas at a time to the pan. Place a lid over the quesadillas to get them nice and crispy and cook for 3-4 minutes on each side or until golden brown. Drain on a paper towel lined plate. Repeat with remaining quesadillas adding more oil if needed. Serve with desired toppings.

Photo by Amy Angelo

Photo by Amy Angelo

Katie Farina2Comment
Simple Massaged Kale Salad
Photo by Amy Angelo

Photo by Amy Angelo

Kale has gotten a bad wrap over the years. It can often be bitter or have too strong of a flavor for many people. Well even kale haters are going to be converted by this super simple, delicious and nutritious salad. The secret to this kale salad is that you physically massage the dressing in, essentially breaking down a lot of the bitter parts and also making it more easily digestible.

I hope you try this super simple recipe, it’s perfect for a quick lunch (I love to add our Quinoa Nuggets or a cooked veggie burger over the top) or a side dish to your Easter festivities.

Cheers,

katie :)


Yield: 3 servings

Simple Massaged Kale Salad

  • 1 large bunch curly leaf kale, cleaned, de-stemmed and finely shredded

  • 3 tablespoons olive oil (2 tablespoons of oil can also be used for a lighter salad)

  • 2 cloves garlic, minced

  • 1 teaspoon lemon zest

  • 1 tablespoon lemon juice

  • ½ teaspoon salt, or to taste

  • Nutritional yeast, optional garnish

  1. Place kale in a large bowl.

  2. Heat a small sauté pan over medium low heat. Once pan is hot, add oil, once oil is hot add garlic. Let sauté, until fragrant, 2-3 minutes. Remove from heat, add lemon zest and lemon juice to pan. Whisk together.

  3. Pour warm dressing over kale. Massage the dressing in with your hands. You DO NOT want to just mix it together you really need to massage it to break down the kale making it less bitter and more flavorful. The kale should shrink in size by at least half after massaging. Salt to taste and finish with a sprinkle of nutritional yeast if desired.

Photo by Amy Angelo

Photo by Amy Angelo

Katie FarinaComment
Candy Bar Stuffed Dates
Photo by Amy Angelo

Photo by Amy Angelo

Finally a healthy candy bar alternative you can feel good about! These little treats look (and taste) just like a mini alternative of everyone’s favorite candy bar … with out all the guilt! These dates come together in less than 20 minutes and are the perfect healthy little treat.

Cheers,

katie :)


Yield: 12 dates

Clean Eating Candy Bar Stuffed Dates

  • 1/4 cup salted all natural peanut butter, softened if hard (see Chef’s Notes)

  • 2 tablespoons maple syrup

  • pinch of salt

  • 12 medjool dates, pitted

  • 1 1/4 cups chocolate chips

  • handful salted peanuts, lightly chopped

  1. Line a small baking sheet or plate with parchment paper.

  2. Mix peanut butter with maple syrup and a pinch of salt in a small bowl.

  3. Split open dates, being sure to remove the pit and stem, spoon in about 2 teaspoons worth of peanut butter mixture. Gently close date back up. Place on prepared baking sheet. Finish with remaining dates. Place in freezer for 30 minutes to harden.

  4. Meanwhile melt chocolate chips: Create a double boiler (simply simmer an inch or two of water in a pot and place a heat safe bowl over the simmering water, being sure the bottom of the bowl does not touch the water), add chocolate chips to bowl of double boiler and let gently melt, being sure to stir often.

  5. Gently chocolate coat dates, I like to use a fork to place in the chocolate and then let any excess chocolate drip off the fork. Place back on baking sheet. Sprinkle with salted peanuts. Return back to freezer until hardened. Store in the freezer, remove from freezer 15 minutes before you’re ready to enjoy so they can thaw a bit.

Chef’s Notes: If your peanut butter is hard and straight from the fridge it won’t work in this recipe. You’ll need to melt it, either place in the microwave in 30 second increments until soft or gently heat in a small sauce pan over very low heat.

Photo by Amy Angelo

Photo by Amy Angelo

Katie Farina2Comment
Guilt-Free Chocolate Covered Strawberry Milkshake
Photo by Amy Angelo

Photo by Amy Angelo

I have to admit Valentine's Day is my favorite holiday . . . I just love LOVE! And one of the best ways I think to show LOVE is through food :) I hope you try this clean eating delicious milkshake you can feel good about and show yourself or someone you love a little LOVE.

Sending you all so much love today and always and thank you from the bottom of my heart for your support :)

Cheers,

katie :)


Yield: 2 servings

Guilt Free Chocolate Covered Strawberry Milkshake

  • 1 cup canned full fat coconut milk (I like @Thai Kitchen brand)

  • 3 cups frozen strawberries, thawed at room temperature for 15 minutes

  • 1-2 tablespoons maple syrup, depending on strawberry sweetness and desired sweetness

  • 1 teaspoon vanilla extract

  • ¼ cup chocolate chips, optional garnish

  • Fresh strawberries, optional garnish

  1. Blend together all ingredients except chocolate chips + fresh strawberries.

  2. Gently melt chocolate (either using the microwave or a double boiler), dip strawberries in melted chocolate, freeze for a few minutes for chocolate to harden and garnish milkshake with strawberries and drizzle with any remaining melted chocolate.

Chef’s Notes: It’s SUPER IMPORTANT to thaw the frozen strawberries at room temperature for 15 minutes to get the right consistency. If the frozen strawberries are not thawed it will be hard to blend with out adding more liquid which would dilute the flavor.

Photo by Amy Angelo

Photo by Amy Angelo

Katie Farina2Comment
Spaghetti Squash Cacio e Pepe
Photo by Amy Angelo

Photo by Amy Angelo

All over Rome there’s a fantastic dish you can find in every restaurant — Cacio e Pepe — an intoxicating but simple pasta dish loaded with cheese and pepper. This happens to be my sister in laws favorite dish of all time, so I really wanted to recreate her favorite dish in a healthy + delicious vegan way. And boy does this version not disappoint, trust me, even spaghetti squash haters are going to be begging for more.

Cheers,

katie :)


Yield: 2 servings

Spaghetti Squash Cacio e Pepe

  • 1 small spaghetti squash

  • 3 tablespoons olive oil + more for roasting squash

  • 4 cloves fresh garlic, finely minced

  • pinch chili flakes

  • 1/2 cup nutritional yeast

  • salt + pepper to taste

  • chopped parsley, optional garnish

  1. Bake spaghetti squash by pre-heating oven to 375. Slice off ends of squash and cut into 3 or 4 circular chunks. Remove seeds. Place on a parchment lined baking sheet. Drizzle with oil and salt. Bake for 40 to 60 minutes or until squash is lightly golden, turning periodically. Let cool slightly. Use a fork to tear away at noodles. *** Cooking the spaghetti squash in this way is super important — cooking another way or in the instapot can lead to soggy noodles, where as when cooked in this way they will be al dente and perfect in this recipe :)

  2. Heat a medium non-stick skillet over medium low heat. Once hot add all olive oil (measure it!), once oil is hot add garlic + chili flakes. Sauté until fragrant, about 2-3 minutes.

  3. Add spaghetti squash noodles to hot oil, mix in nutritional yeast. Salt and pepper to taste. Garnish with parsley if desired.

Photo by Amy Angelo

Photo by Amy Angelo

Katie Farina2Comment
Winter Roasted Vegetable + Tempeh Salad
Photo by Amy Angelo

Photo by Amy Angelo

I’ll be the first to admit I’m not a salad lover — always seems boring to me! But, not this salad — this is no wimpy salad, it’s bursting with tons of flavor + texture. This salad really is a whole meal, that will keep you satisfied and craving it again and again.

We start off with a super simple blendable salad dressing, forget store bought dressing, this comes together in minutes and tastes so much better. Then we sear up some tempeh bacon, roast sweet potatoes (or squash of choice), and finish with toasted nuts, and apple chunks. Really all the best winter flavors in one delicious and hearty salad.

Cheers,

katie :)


Yield: 6 servings

Winter Roasted Vegetable + Tempeh Salad

MAPLE APPLE DIJON DRESSING:

  • ¼ cup extra virgin olive oil

  • 2 tablespoons maple syrup

  • 2 tablespoons Dijon mustard

  • 2 tablespoons apple cider vinegar

  • 1 tablespoon water

  • 1 garlic clove, loosely chopped

  • ½ teaspoon salt

SALAD:

  • 1 medium sweet potato, skin on, cut into bite size pieces (any kind of squash or even Brussels sprouts would be a great substitution)

  • Neutral high-heat oil of choice for roasting + frying (avocado, refined coconut, grapeseed, etc.)

  • 1 package “San Diego Tempeh” Chickpea Sunflower Seed Tempeh or tempeh of choice

  • Coconut Aminos

  • 1 bag salad greens of choice

  • 1 medium sweet apple of choice (I like Fuji or Pink Lady), cut into bite size pieces

  • Handful of nuts or seeds, lightly toasted

  1. Roast Sweet Potato: Pre-heat oven to 375. Line a baking sheet with parchment paper. Toss sweet potatoes in enough oil to coat and a few generous pinches of salt. Evenly spread out on prepared baking sheet. Roast for 30-40 minutes, stirring often. *** Cooking time will depend on the cut of the sweet potato; smaller cuts will cook quicker than larger cuts.

  2. Tempeh Bacon: Take block of tempeh and cut it into ¼ inch slices, place in a small rimmed dish, drizzle with coconut aminos and let marinade for 20 minutes. Then heat a non-stick skillet over medium heat. Once hot add enough oil to barely cover the bottom of the pan. Once oil is hot add tempeh, searing each side for 3-4 minutes on each side or until crispy. Drain on a paper towel lined plate. Cut into bite size pieces.

  3. Toss salad greens with desired amount of dressing, garnish with roasted sweet potatoes, tempeh bacon, apple, and nuts/seeds of choice.

Katie Farina2Comment
4 Ingredient Cheesy Quinoa Nuggets
Photo by Amy Angelo

Photo by Amy Angelo

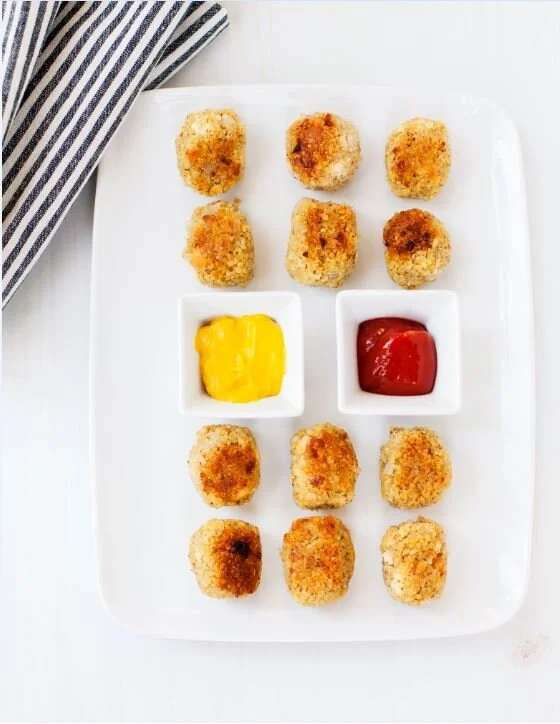
These 4 ingredient Quinoa Nuggets are going to be a staple in your house — trust me, I literally make them multiple times every week. This dish comes together in about 15 minutes and is perfect for when you got nothing in the fridge. Trust me kids and adults alike will LOVE this dish!

It’s so simple to make these nuggets, simply combine hot cooked quinoa with nutritional yeast, salt, and green onions, form into nuggets and sear in hot oil — that’s it! I love dipping them in ketchup + mustard but would be amazing with ranch or BBQ sauce too.

Cheers,

katie :)


Yield: About 20 nuggets

4 Ingredient Cheesy Quinoa Nuggets

  • 1 cup dry quinoa

  • 1/2 cup nutritional yeast

  • 4 green onions, white + green part, finely minced

  • 1 + 1/2 teaspoons salt

  • 1-2 tablespoons high heat oil (I like refined coconut oil)

  1. Cook quinoa according to package directions. *** It works best if the quinoa is cooked with a little more water and cooked on the stovetop as opposed to the instapot.

  2. Combine HOT cooked quinoa with nutritional yeast, green onions, and salt. Salt to taste. Using a cookie dough scoop TIGHTLY form into desired nugget shapes.

  3. Heat a non-stick pan over medium heat. Once hot add oil, once oil is hot add nuggets, being sure not to crowd the pan (you may need to make in 2 batches).

Chef’s Notes:

1. Be sure to use HOT cooked quinoa, as the hot quinoa is actually the binder to this recipe. Re-heated previously cooked quinoa will not work in this recipe.

Katie FarinaComment
Protein Packed Chickpea Chocolate Chip Cookies
Photo by Amy Angelo

Photo by Amy Angelo

Love baking? Me too! These pillowy soft baked clean eating chocolate chip cookies taste sinful but are actually made with chickpeas. And guess what this recipe comes together in minutes and better yet can be made with one dish -- yes please! They happen to be nut-free, gluten-free and of course vegan -- so everyone can enjoy these beauties. This is the perfect recipe to whip up to enjoy by the tree with your family or leave out for Santa :) 

Cheers,

katie :)


Yield: 12 small cookies

Protein Packed Chickpea Chocolate Chip Cookies

  • 1 (15.5 ounce) can chickpeas (drained + rinsed)

  • ¼ cup maple syrup

  • ½ cup coconut butter, melted (see Chef’s Notes)

  • 1 tablespoon non-dairy milk of choice

  • 1 tablespoon vanilla protein powder

  • ½ teaspoon salt

  • 1 teaspoon baking powder

  • 1/3 cup chocolate chips (or more!)

  1. Pre-heat oven to 350. Line a baking sheet with parchment paper.

  2. Combine all ingredients together in a food processor, process for 1 minute, scrape down. Process for another 1-2 minutes until a creamy smooth hummus like consistency is reached, being sure there’s no chunks of chickpeas.

  3. Scoop 1 tablespoon of dough onto prepared baking sheet, gently flatten until about ½ inch. Garnish with chocolate chips. Bake for 20 minutes. Let cool completely before enjoying, they will harden as they cool.

Chef’s Notes:

1.  To melt coconut butter: Boil a small pot of water. Once boiling turn water off. Place jar of coconut butter directly in water. Let jar sit there for about 10 minutes. This will gently melt coconut butter making it easy to scoop out.

2.  Make sure and use parchment paper when baking as these will stick to a traditional baking sheet with out.

Katie Farina2Comment
Quinoa Pizza with Sage Hummus, Butternut Squash + Sauteed Kale
Photo by Amy Angelo

Photo by Amy Angelo

I’m sharing with you one of my most favorite dishes of all time! Perfect for holiday appetizers, movie night or the perfect meal prepped lunch. This pizza has a few different layers, but trust me you’re gonna love it so much you’ll have this dish on repeat. We start by making pizza crust out of quinoa . . . yes you read that right! Topping it with an out of control sage hummus, sauteed kale and roasted butternut squash for the perfect clean eating healthy pizza everyone will love.

Cheers,

katie :)


Yield: 3 Pizzas with 8 Small slices each

Quinoa Pizza with Sage Hummus, Butternut Squash + Sauteed Kale

Quinoa Pizza Crust (Triple)

  • 1 cup quinoa, rinsed thoroughly and soaked in water for 8 hours to overnight

  • 1/2 cup water

  • 3/4 teaspoon salt

  • 1/2 teaspoon garlic powder

  • 1/2 teaspoon baking powder

  • 1 tablespoon olive oil

Sage Hummus

  • 1 small yellow onion, small dice

  • 4 cloves garlic, minced

  • 1 (15.5 ounce) can white beans, drained + rinsed

  • Juice of 1 lemon

  • 1/4 cup nutritional yeast

  • 1/4 cup olive oil + more for sautéing onion and garlic

  • 1 small bunch of sage

  • Salt to taste

    Roasted Squash

  • 3 cups bite size pieces of butternut squash

  • High heat oil

  • Salt

    Kale Mix

  • Olive oil

  • 1 small yellow onion, small dice

  • 4 cloves garlic, minced

  • Pinch of chili flakes (or to taste) 

  • 1 bunch of kale of choice, cleaned, de-stemmed and cut into ribbons

  • Juice of ½ a lemon

  • Salt to taste

Quinoa Crust: Pre-heat oven to 425. Line a rimmed baking sheet with parchment paper, lightly brush or spray with oil. Drain soaking quinoa and add to a blender with remaining ingredients. Blend until smooth pancake batter consistency is reached. Pour mixture into center of prepared baking sheet, creating a rustic pizza shape. Bake for 20-25 minutes or until crust is firm and slightly golden. Top with hummus, roasted squash, and sauteed kale.

*** Be sure to make the crust recipe 3 separate times, do not combine into one blender and be sure to soak the quinoa separately (in 1 cup measurements). 

Sage Hummus: Heat up a sauté pan over medium low, add enough olive oil to generously coat the pan. Add onion and garlic, sauté until fragrant, about 15 minutes. Add onion and garlic to a food processor with remaining ingredients, process until smooth. Salt to taste. 

Roasted Squash: Pre-heat oven to 425. Toss squash in enough oil to coat and a few pinches of salt. Bake for 45 minutes, or until roasted, being sure to constantly stir to prevent burning.

Kale : Heat up a cast iron skillet or sauté pan over medium low heat, once hot add oil, once oil is hot add onion, garlic and chili flakes. Sauté over medium low until fragrant, about 15 minutes. Add kale and lemon juice, sauté until wilted, about 3 or 4 minutes. Salt to taste. 

Photo by Amy Angelo

Photo by Amy Angelo

Katie Farina2Comment
Grain Free Pumpkin Pie Granola
Photo by Amy Angelo

Photo by Amy Angelo

Where all my pumpkin lovers at?!?! I literally can’t get enough pumpkin right now! I’m loving making lattes and pumpkin desserts but really wanted a fun + healthy way to infuse it into breakfast. This Grain Free Pumpkin Pie Granola is the perfect way to get your pumpkin fix in a easy and delicious way. It also makes a great holiday gift + make ahead breakfast.

Cheers,

katie :)


Yield: 6 Servings

Grain Free Pumpkin Pie Granola

  • 1 cup unsweetened shredded coconut

  • 1 cup seeds of choice (sunflower or pumpkin seeds work best)

  • 1 cup nuts of choice (pecans, walnuts, almonds, etc.…), loosely chopped

  • 2 teaspoons pumpkin pie spice

  • 1 teaspoon cinnamon

  • ½ teaspoon salt

  • 1/3 cup maple syrup

  • ¼ cup canned pumpkin puree

  • 2 ½ tablespoons coconut oil, melted

  1. Pre-heat oven to 350. Line a baking sheet with parchment paper.

  2. Combine all ingredients together. Pour onto prepared baking sheet, being sure to evenly disperse.

  3. Bake for 35-40 minutes, stirring every 10 minutes or so, being sure to watch it carefully in the last few minutes of cooking.

  4. Let cool completely, break apart and enjoy!

Photo by Amy Angelo

Photo by Amy Angelo

Katie Farina2Comment
Grain Free Apple Pie Porridge
Photo by Amy Angelo

Photo by Amy Angelo

Fall is finally here! I have to admit fall food is just my favorite, the squashes, soups, roasted vegetables, and of course all the apples. This is the perfect clean eating, grain-free, sugar-free porridge that tastes like apple pie with out all the work or guilt. Simply process together unsweetened non-dairy yogurt, tons of apples, banana, cinnamon, and a little lemon juice for a delicious breakfast. It’s a perfect meal prep breakfast as it can be stored in little Tupperware containers and topped with fruit and granola for a quick breakfast or snack. I hope you try my sweet friends and happy fall :)

Cheers,

katie :)


Yield: 3 Servings

Grain Free Apple Pie Porridge

  • ¾ cup non-dairy unsweetened yogurt of choice (I like Culina)

  • 3 medium apples of choice, skin on, medium dice (I like Pink Lady Apples)

  • 1 medium ripe banana, cut into chunks

  • 2 teaspoons cinnamon powder

  • Juice of ½ a lemon

  • Optional Garnishes: fresh fruit, granola, hemp seeds, etc…

  1. Combine all ingredients together in a food processor, process until apples and bananas are broken into little pieces, scraping down as necessary. This takes about 1-2 minutes.

  2. Serve with desired garnishes. Store remaining porridge in the fridge.

Katie Farina2Comment
Low Sugar Raw Chocolate Raspberry Bar
Photo by Amy Angelo

Photo by Amy Angelo

Need a sweet treat with out all the sugar?!?! This clean eating Low Sugar Raw Chocolate Raspberry Bar is going to become your new best friend. It’s loaded with healthy fats, fiber, and antioxidants but tastes like a totally decadent dessert. Forget candy and cookies, next time the sugar craving hits reach for this delicious alternative!

Cheers,

katie :)


Yield: 6 Servings

Low Sugar Raw Chocolate Raspberry Bar

  • 1/2 cup raw cacao powder

  • 1/4 cup maple syrup, at room temperature

  • 1/2 cup coconut oil, melted

  • 2 tablespoons almond butter, at room temperature

  • Pinch of salt

  • 1/2 cup large shred unsweetened coconut

  • 1 heaping cup frozen raspberries, loosely chopped

  1. Line a 9X9 baking dish with parchment paper.

  2. In a large bowl whisk together cacao powder, maple syrup, coconut oil, almond butter, and a pinch of salt until smooth.

  3. Add shredded coconut to chocolate mixture, stir until combined.

  4. Pour mixture onto prepared baking sheet. Garnish with chopped frozen raspberries. 

  5. Place in freezer until ready to serve. 

Photo by Amy Angelo

Photo by Amy Angelo

Katie Farina2Comment
Superfood Sleepy Time Latte
Photo by Amy Angelo

Photo by Amy Angelo

Got sleeping issues?!!?! I hear ya! This is the perfect comforting warming latte to help you wind down for the evening. It’s also loaded with superfoods (think chamomile, cinnamon, and ashwaganda) that are specifically beneficial for helping you get some zzz’s.

This is my favorite part of my evening routine and I genuinely find that it really helps me sleep! What’s your favorite night-time wind down ritual?

Cheers,

katie :)


Yield: 1 Serving

Superfood Sleepy Time Latte

  • 1 1/4 cup non-dairy milk of choice (coconut, almond, cashew)

    ***For a creamier latte, replace 1 to 2 tablespoons of milk with canned coconut milk

  • 2 chamomile tea bags or 1 tablespoon loose chamomile flowers

  • 2 to 3 teaspoons maple syrup, or more to taste

  • 1/2 teaspoon cinnamon

  • 1/4 teaspoon ashwaganda

  • 1/2 teaspoon vanilla extract

  1. Gently warm milk until lightly bubbling but not boiling. Turn off and add chamomile. Cover and let steep for 5 to 10 minutes.

  2. Meanwhile, place maple syrup and remaining ingredients into a mug. Mix until a loose paste is reached.

  3. Strain milk (if using loose leaf chamomile) and pour chamomile milk into mug; mix until incorporated. Sweeten to taste.

Photo by Amy Angelo

Photo by Amy Angelo

Katie FarinaComment
Roasted Garlic Portabello Sandwich with Pesto
Photo by Amy Angelo

Photo by Amy Angelo

You are better than microwaveable meals and Pb + J for lunch! Upgrade your lunch to something you’ll actually look forward to while still having something totally healthy. Enter our Roasted Garlic Portabello Sandwich with Pesto, this sandwich comes together so easily and tastes better than those high-end restaurants.

While the oven is heating up simply marinate portabello mushrooms with olive oil, balsamic, garlic, and salt. Roast to perfection. Toast your bun — I like LittleNorthernBakehouse buns, smear with our Spinach Pesto (or don’t be a hero — store bought is almost as good), layer with a mushroom, grilled, onions, and arugula.

I hope you try this easy and delicious sandwich and upgrade your lunch!

Cheers,

katie :)


Yield: 4 Servings

Roasted Garlic Portabello Sandwich with Pesto

Portabello Burgers:

  • 4 portabello mushrooms

  • ¼ cup balsamic vinegar

  • 2 tablespoons olive oil

  • 4 cloves garlic, minced

  • 1 red onion, cut into 4 thick slices, rings kept together

  • Handful of arugula

  • Little Northern Bake House Gluten-Free buns

  • Spinach Pesto (see below)

Spinach Pesto:

  • 2 cloves garlic, minced

  • 2 cups loosely packed baby spinach

  • 1 big bunch of basil, about 30 leaves

  • Juice of ½ a lemon

  • 1/3 cup nutritional yeast

  • 1/3 cup + 1 tablespoon olive oil

  • Salt to taste, about ½- ¾ teaspoon

  1. Pre-heat oven to 375. Line a rimmed baking sheet with parchment paper.

  2. Clean mushrooms with a damp paper towel. Gently de-stem. Using a spoon, scrape out the gills.

  3. Place mushrooms (cap side up) on prepared baking sheet. Whisk together balsamic vinegar, olive oil, garlic, and a few big pinches of salt. Massage mixture onto mushrooms, pouring any remainder liquid on the top of the mushroom. Add red onion slices to opposite side of baking sheet.

  4. Bake for 30 minutes, flip and bake for an additional 15 minutes.

  5. Meanwhile make pesto: Combine all ingredients in a food processor, and process until smooth. Salt to taste.

  6. Toast buns, generously smear with pesto, layer mushroom, red onion slices, and arugula. Enjoy!

Chef’s Tip: Be sure to use a rimmed baking sheet so any excess liquid doesn’t fall into your oven. Also be sure to parchment line the baking sheet so it’s easier to clean up … trust me!

*** This post was sponsored by Little Northern Bake House, but the opinions are my own.

Photo by Amy Angelo

Photo by Amy Angelo

Katie Farina2Comment
Chocolate Cherry Smoothie Bowl
Photo by Amy Angelo

Photo by Amy Angelo

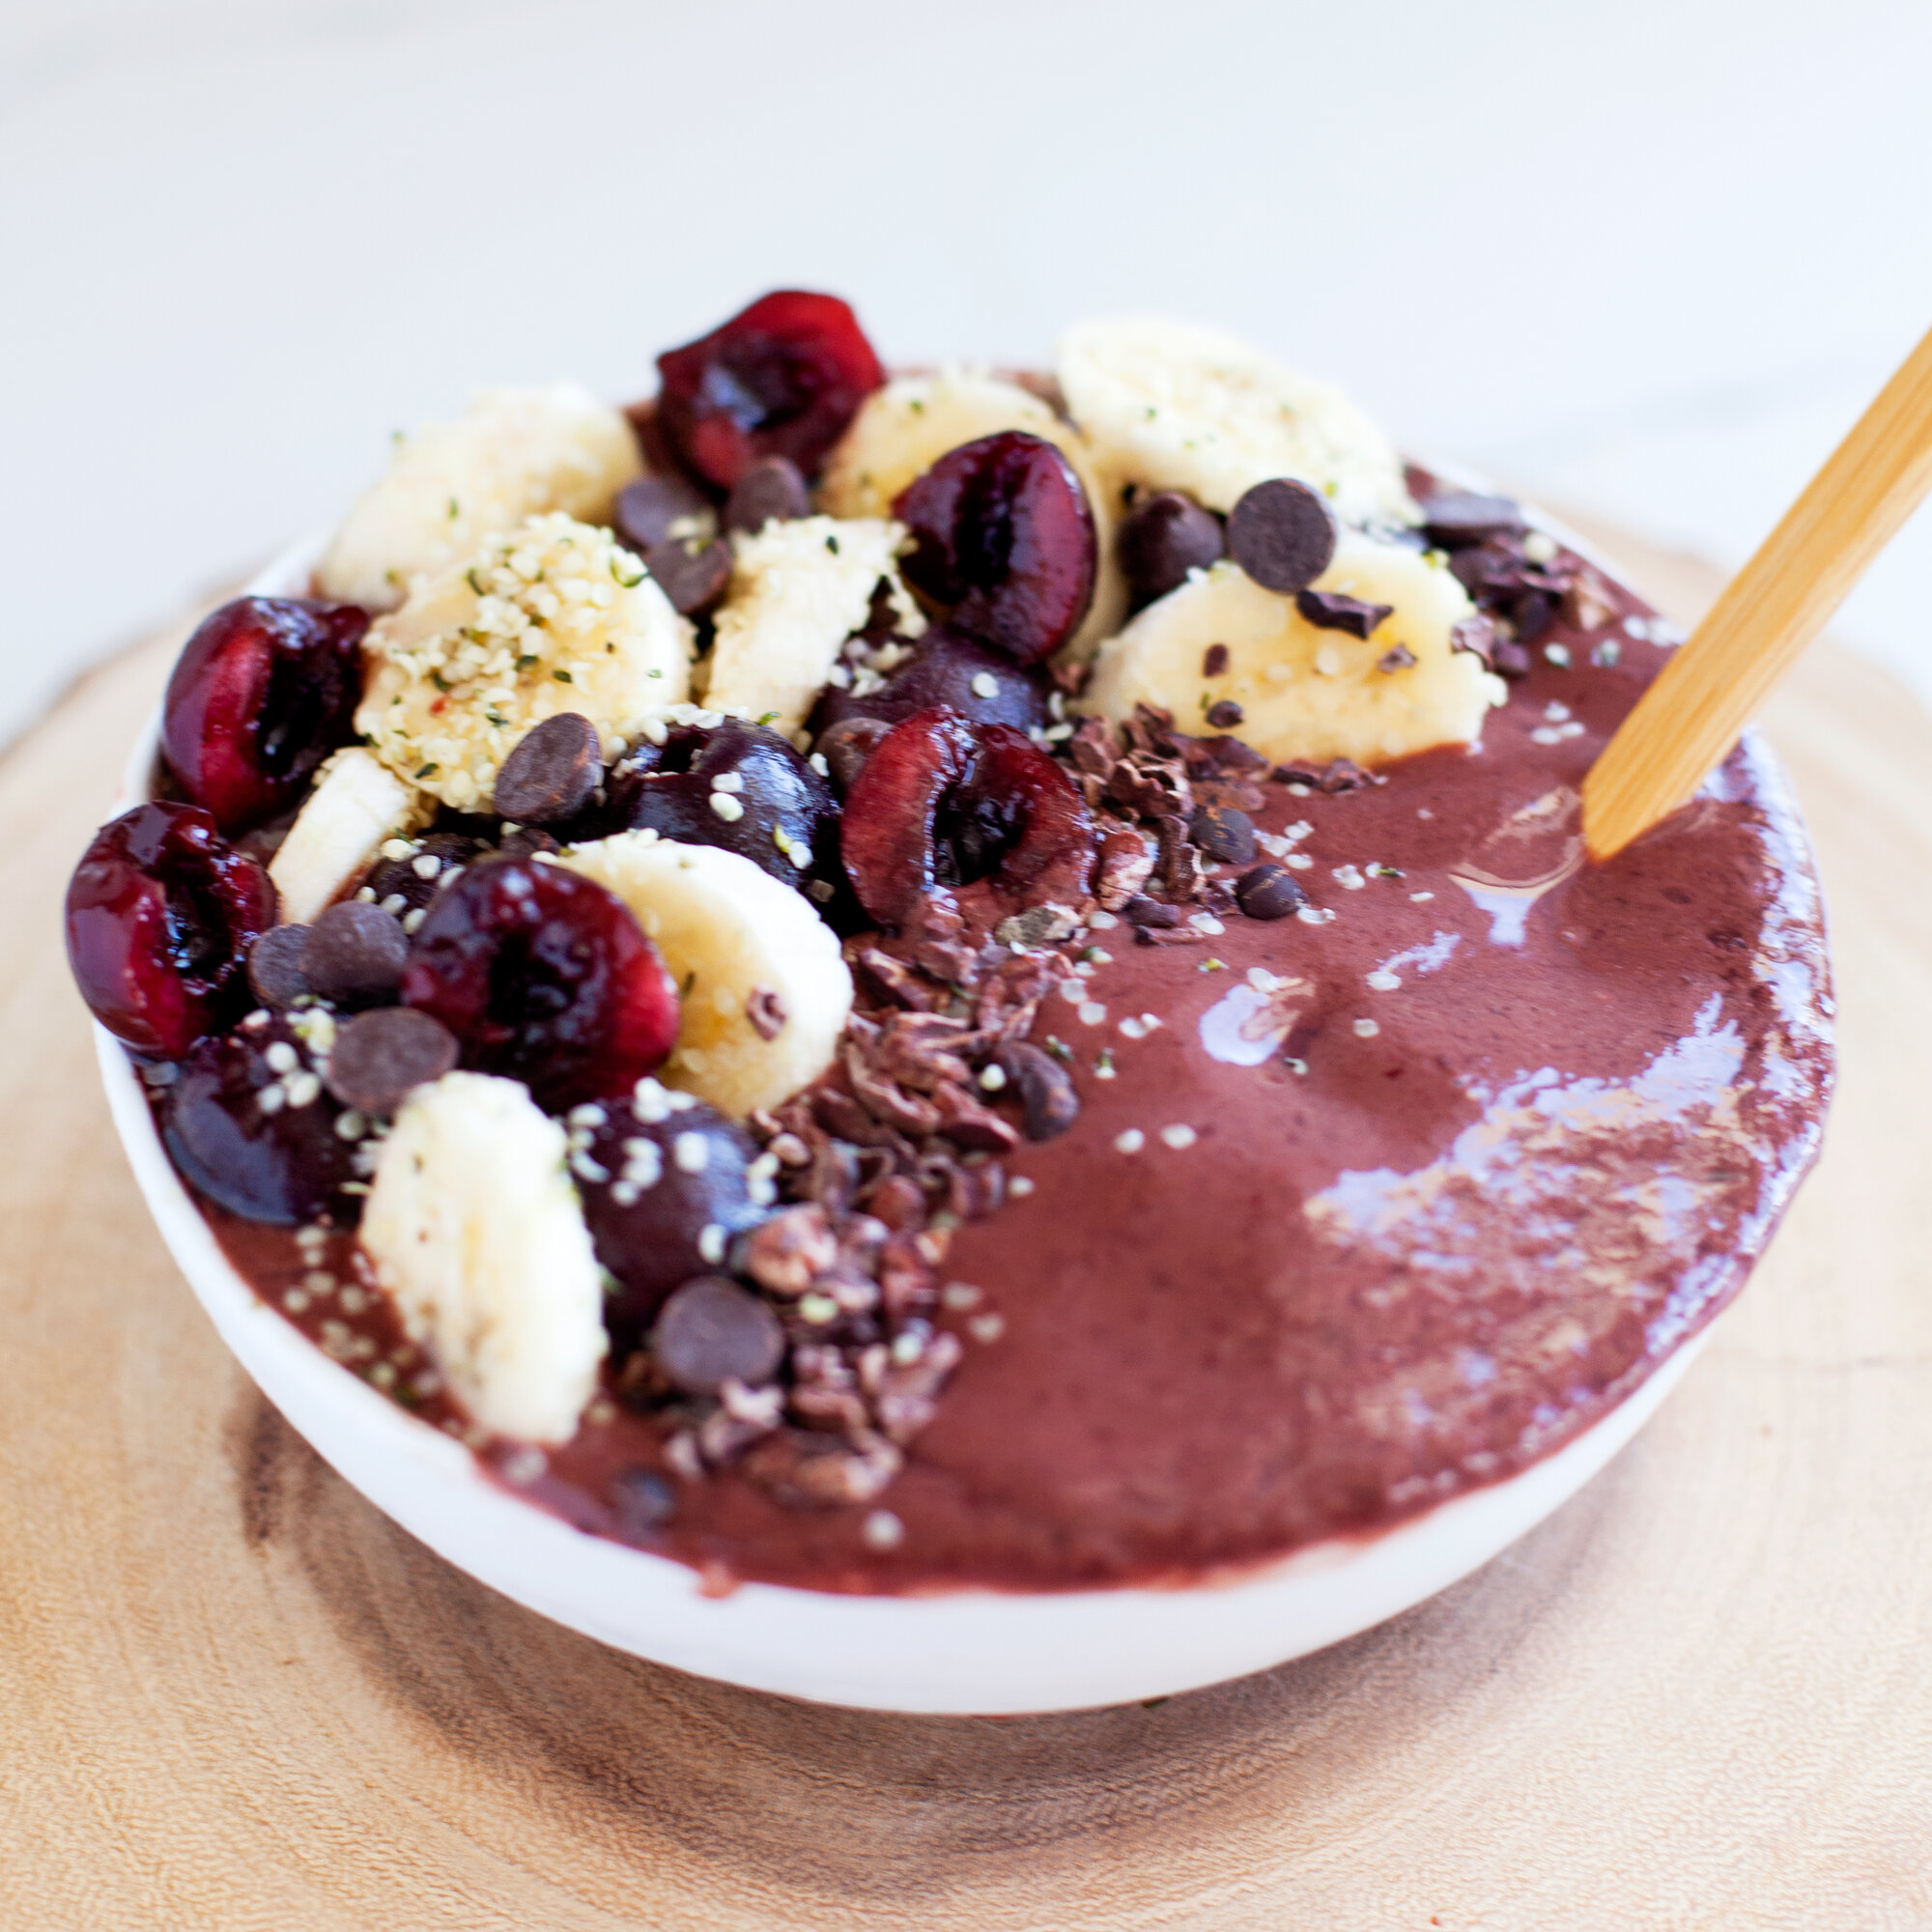
The perfect easy + healthy breakfast that really tastes like an indulgent treat! This Chocolate Cherry Smoothie Bowl is a chocolate lovers dream come true and doubles as a great guilt-free dessert.

The base of this smoothie bowl is frozen dark cherries which are off the charts in antioxidants and a great source of plant based iron … plus they taste like candy! Blend that with frozen bananas, plant based milk, and a little raw cacao powder for the perfect smoothie bowl. We’re using raw cacao powder which is extremely high in antioxidants, fiber, and magnesium …. yes chocolate does the body good!

I hope you enjoy!

Cheers,

katie :)


Yield: 2 Servings

Chocolate Cherry Smoothie Bowl

  • 1 cup non-dairy unsweetened milk of choice (almond, cashew, oat, etc.)

  • 2 cups frozen dark chocolate cherries, thawed at room temperature for 15 minutes

  • 1+ 1/2 frozen bananas, peeled and cut into chunks, thawed at room temperature for 15 minutes

  • 2 tablespoons raw cacao powder

  • Optional garnishes: chocolate chunks, cacao nibs, fruit, granola, etc…

  1. Combine all ingredients in a high speed blender, until smooth. Adjust flavor as desired. Garnish with optional add ins.

Chef’s Tip: Be sure to let the frozen fruit thaw at room temperature for 15 minutes before blending, this will yield the perfect smoothie bowl consistency with out having to add excess liquid. Also be sure to use frozen bananas in this recipe, fresh will create a off consistency.

Photo by Amy Angelo

Photo by Amy Angelo

Katie Farina2Comment